In this guide you will learn how to connect your Raspbery Pi 2 to IFTTT.com via their Maker Channel. We will create a physical button that when pressed will log data to Evernote. We will use Node RED to program our Raspbery Pi, WoTKit for real-world data, and IFTTT to connect things together.
About IFTTT
IFTTT is an online service that allows you to connect services together by connecting trigger events to actions. It allows you to do things like: when you receive a mail from a friend, append to a to-do list that you need to read it, or when a new blog post is published in an RSS feed you receive an SMS with the headline.
![]()
In this guide we will use this service to send data to Evernote, but you can try sending it to any other of their channels. For example: IoS, Epicurious, Android Devices, Fitbit, and many others. You can find more infomation on https://ifttt.com/
What is Node RED?
Node-RED is a visual tool for wiring the Internet of Things developed by IBM Emerging Technology and the open source community. Using Node-RED, developers wire up input, output and processing nodes to create flows to process data, control things, or send alerts. It works by allowing you to wire up web services or custom “nodes” to each other, or to things, to do things like:
- Send an email on a rainy weather forecast.
- Push sensor data to services like Twitter.
- Perform complex analysis on data with ease.
If you’re new to Node RED you might find our Introduction to Node RED tutorial very helpful.
Creating a IFTTT Recipe
Visit IFTTT https://ifttt.com/maker to enable your Maker channel.
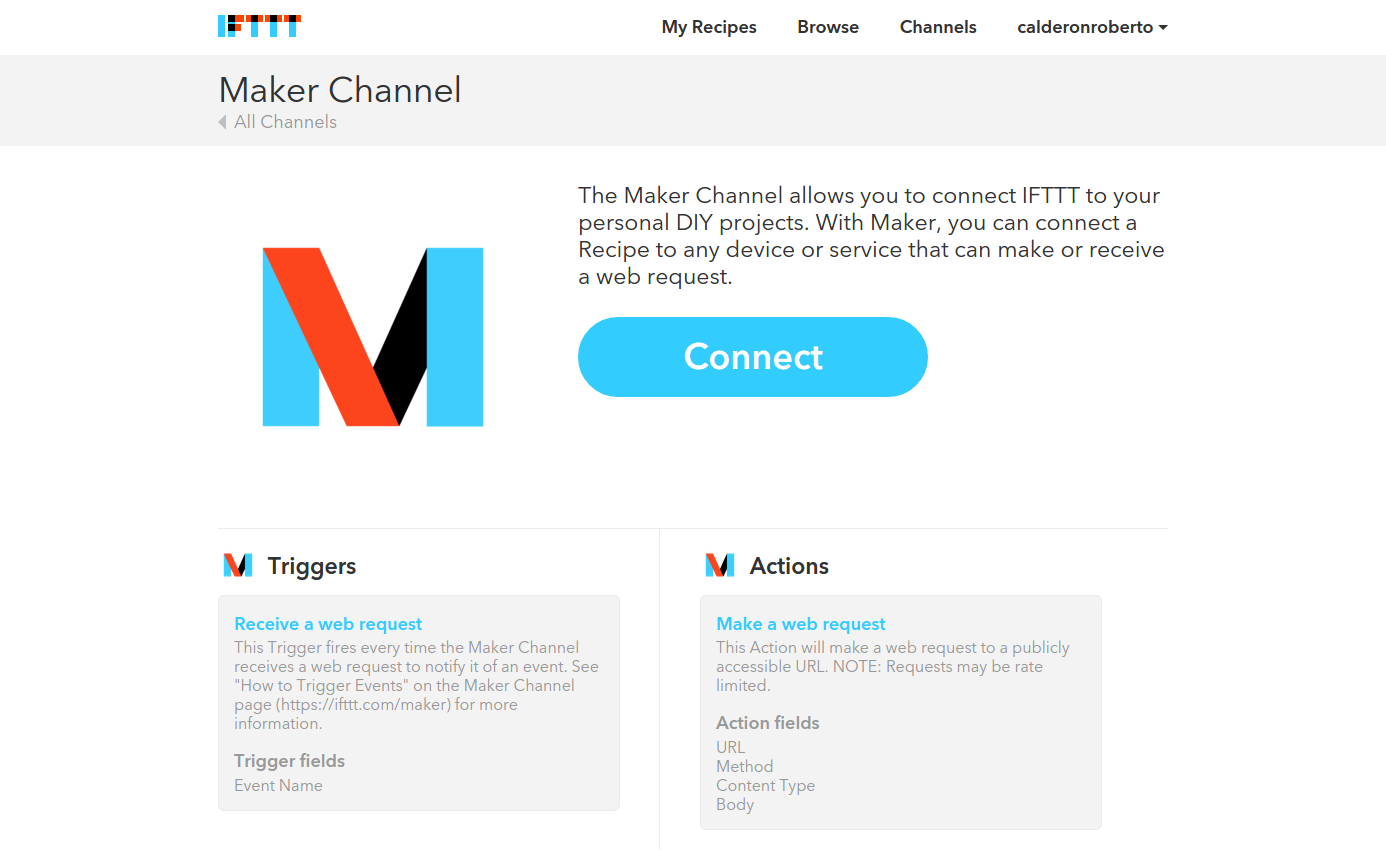
Click on “Connect” to enable your channel.
Now that you have enabled the Maker channel you can use it in your recipes. Click on “Make a web request”, or create a new recipe under “My Recipes”.
Click on “this” to select the trigger channel, search for the Maker channel and click on it:

Select “Receive a web request”
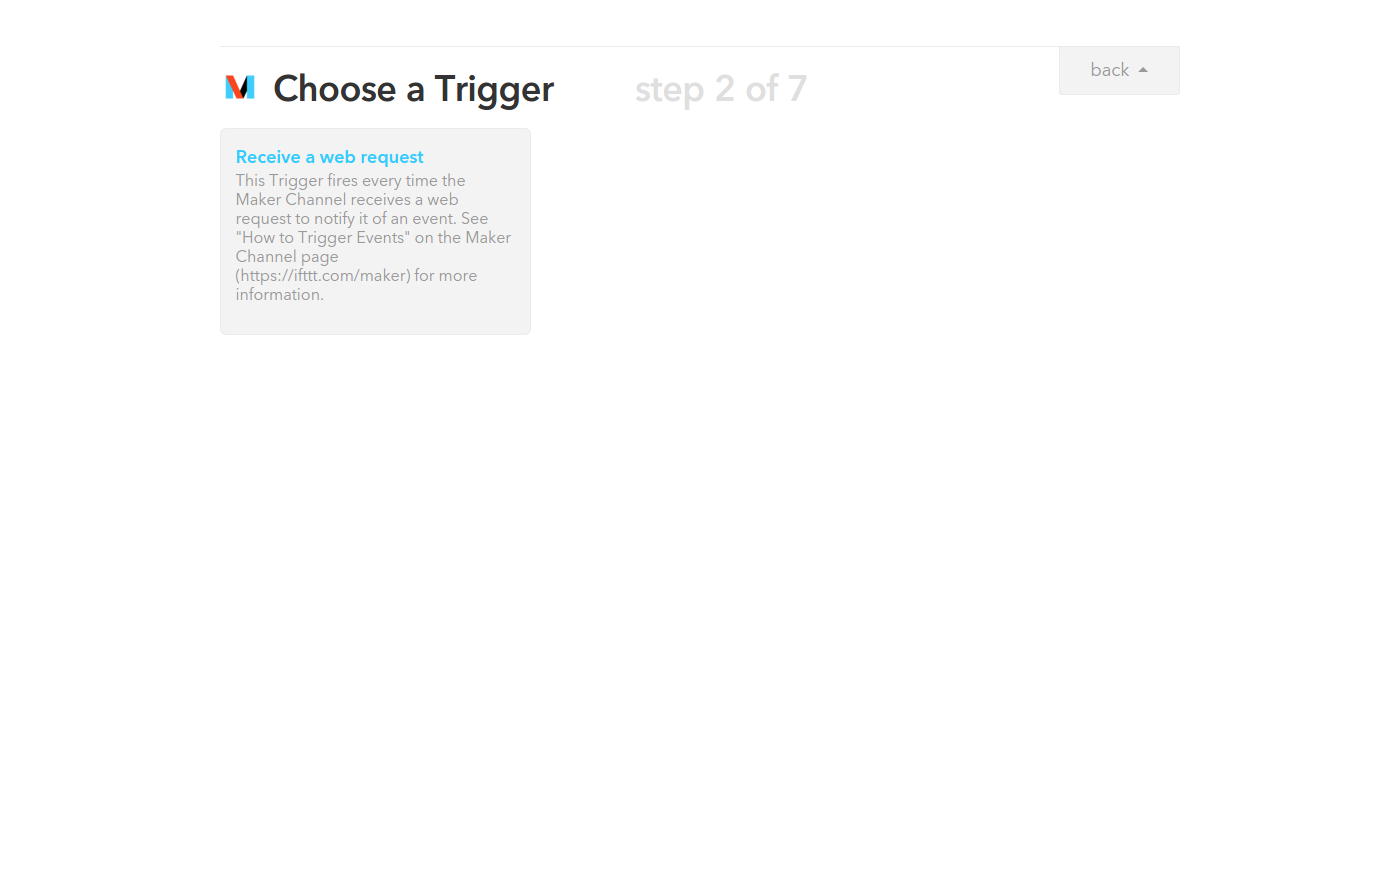
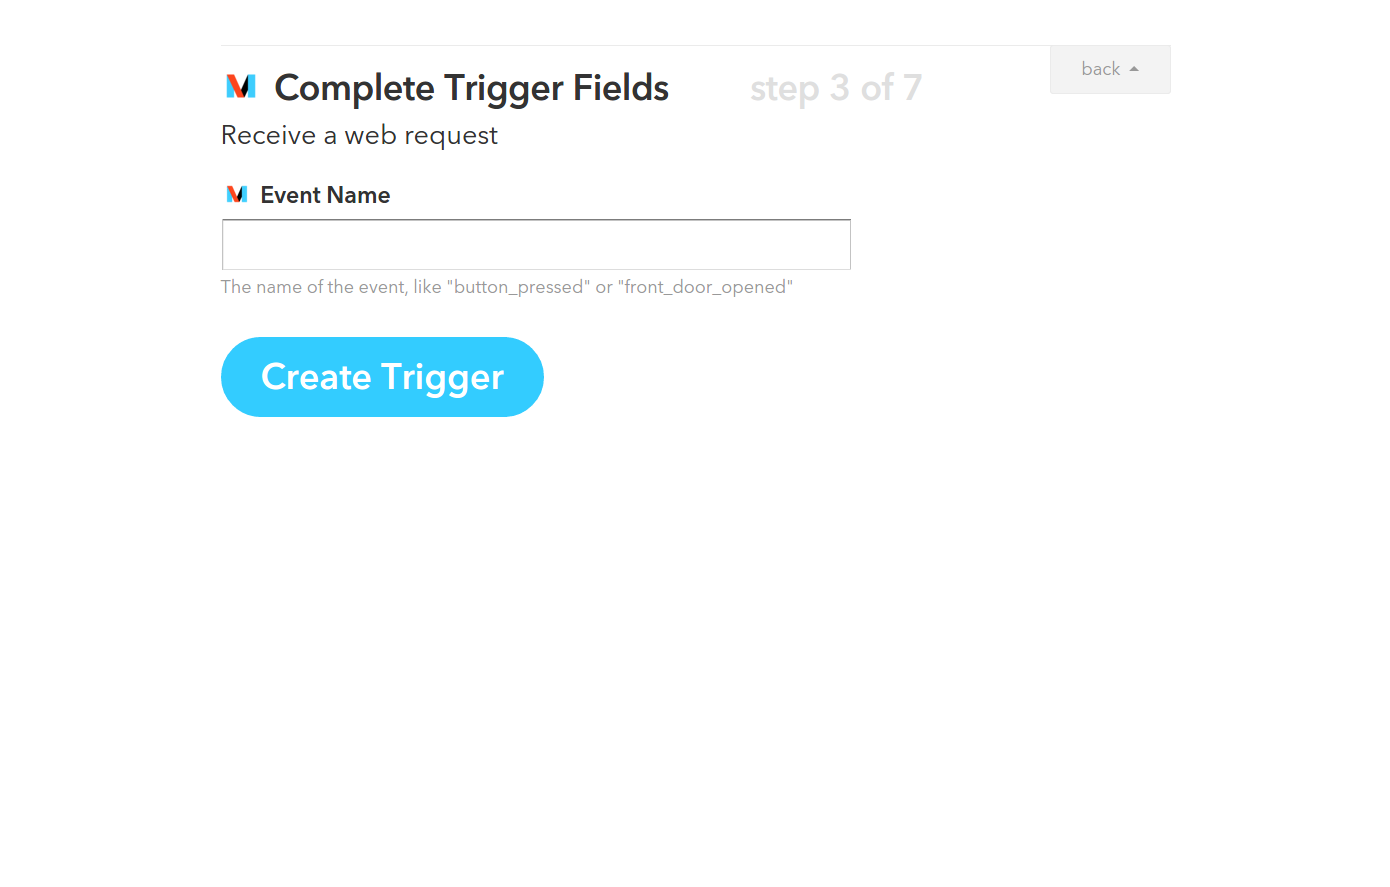
This will help you configure a recipe triggered by receiving an http request. Type a name for your event, let’s name it “button_pressed”.
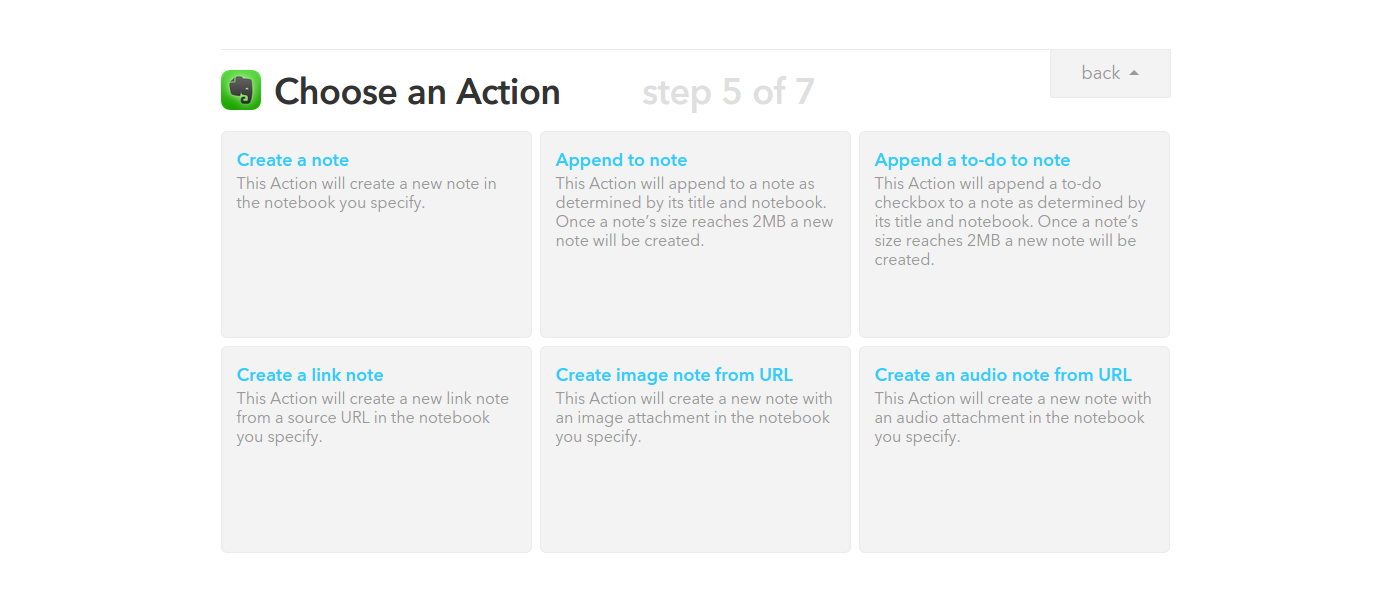
Now click on “that” to select your “action channel”. For this example we will use the Evernote channel. If haven’t connected the Evernote Channel go ahead and click on “Connect” to enable this channel. Once enabled you can search for “Evernote” and click on it. Select “Append to note”, since we are making a simple log we want to append to a single to-do list that we can later explore.
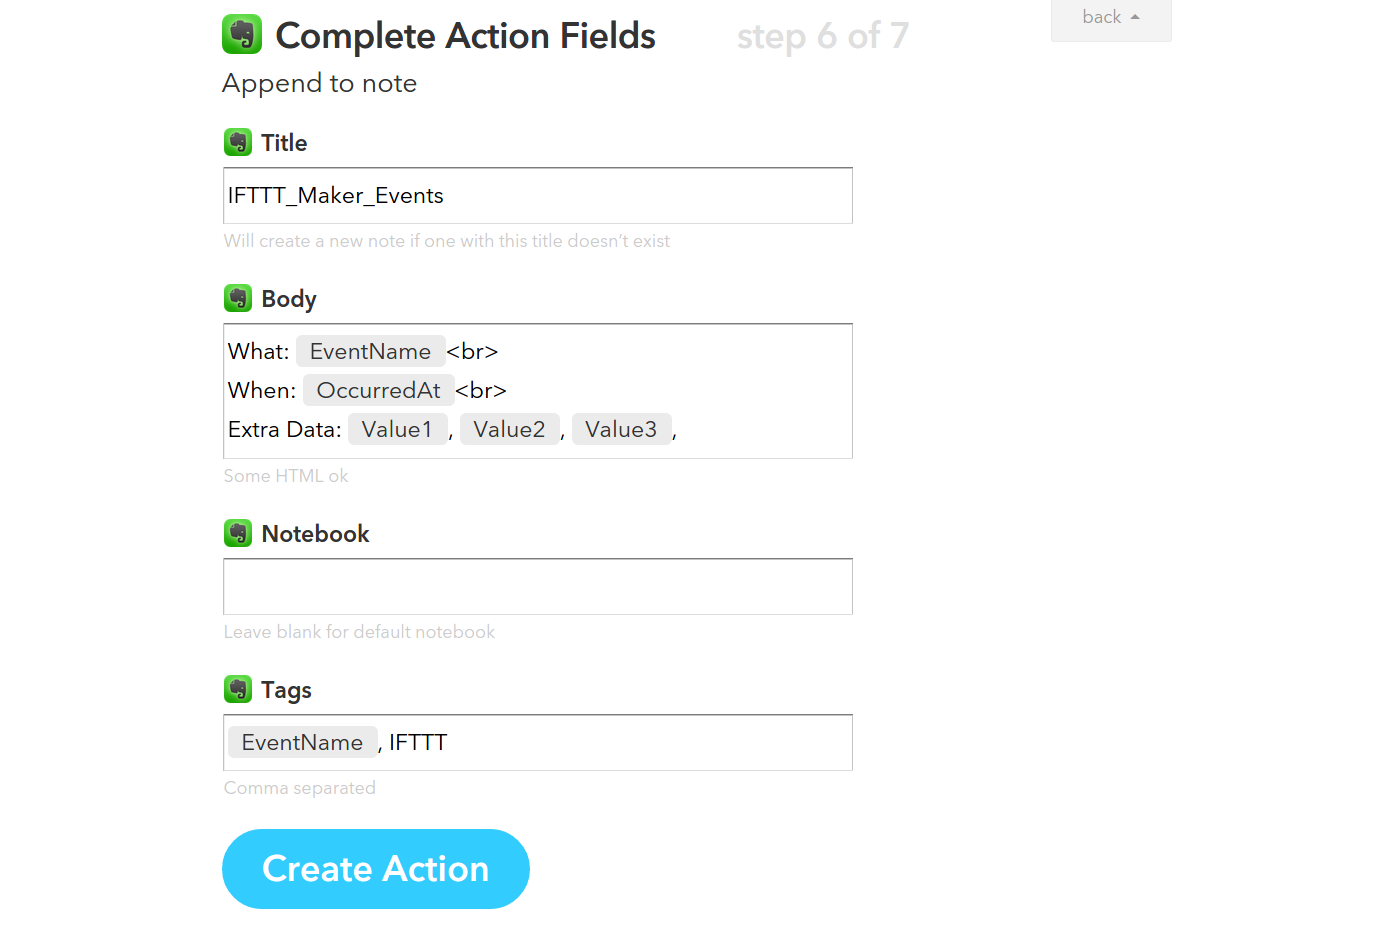
We will leave the action fields with the default values. So click on “Create Action”. And click on “Create Recipe”
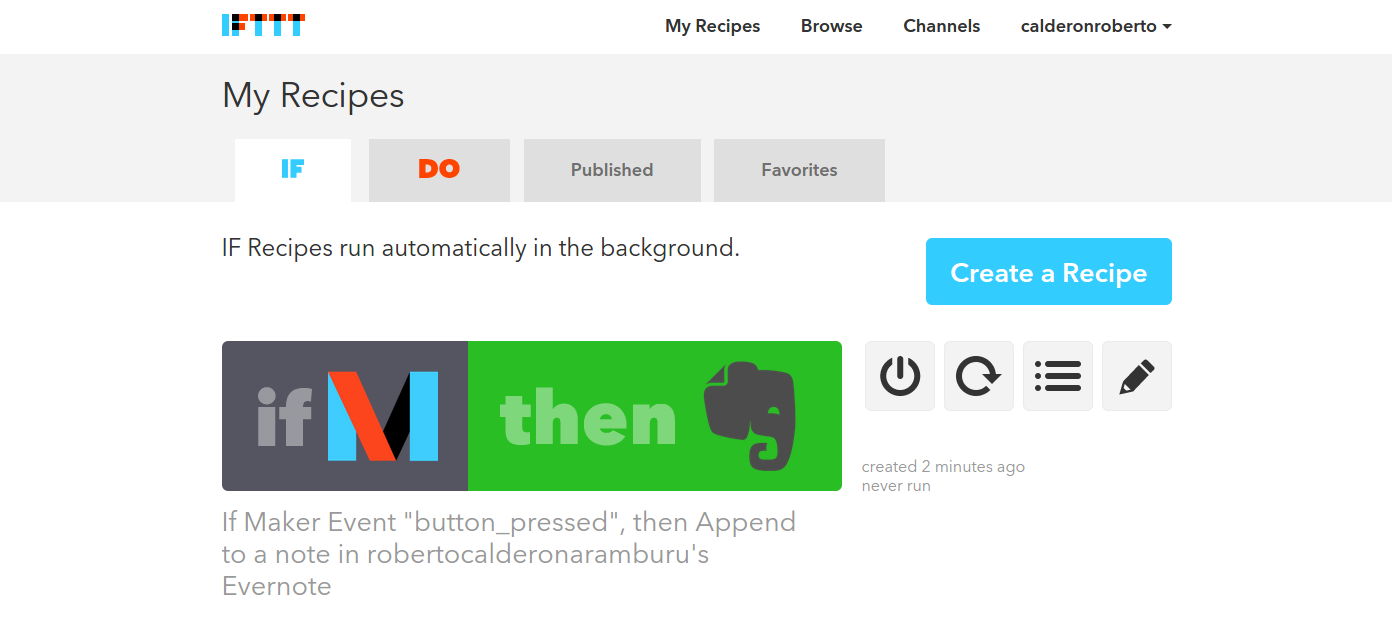
You should be able to see your recipe in your “My Recipes” tab.
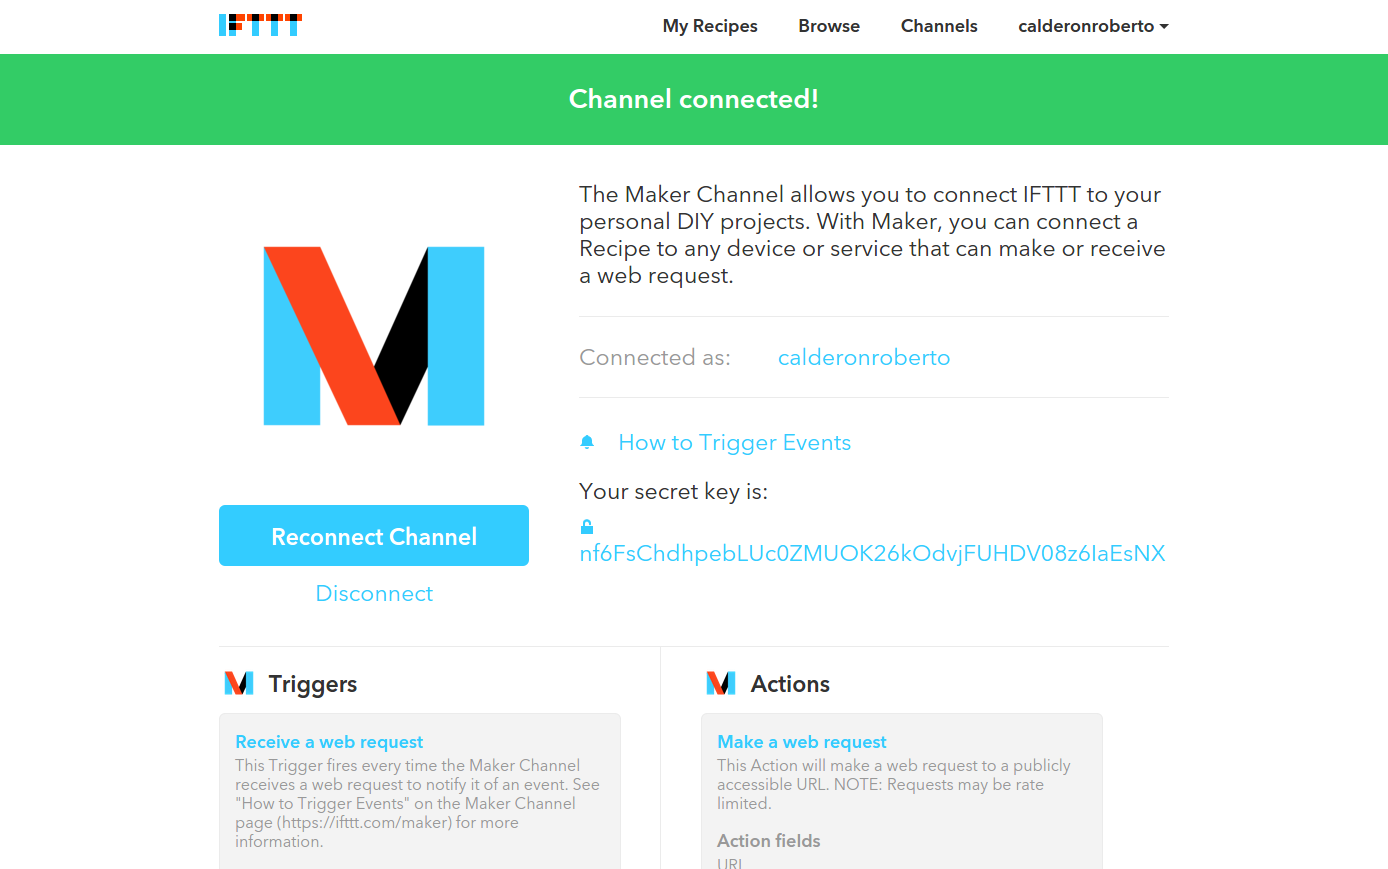
That’s it! To send events to your recipe you can find the documentation under “How to trigger events” in the Maker Channel page: https://ifttt.com/maker
You will notice (at the time of writing) that you can do a POST request to the URL
[text]
https://maker.ifttt.com/trigger/{event}/with/key/{YOURKEY}
[/text]
You can add a JSON body:
[javascript]
{ “value1” : “”, “value2” : “”, “value3” : “” }
[/javascript]
We will create a JSON object with Node RED that contains these three values.
Wiring a button to our Raspberry Pi 2
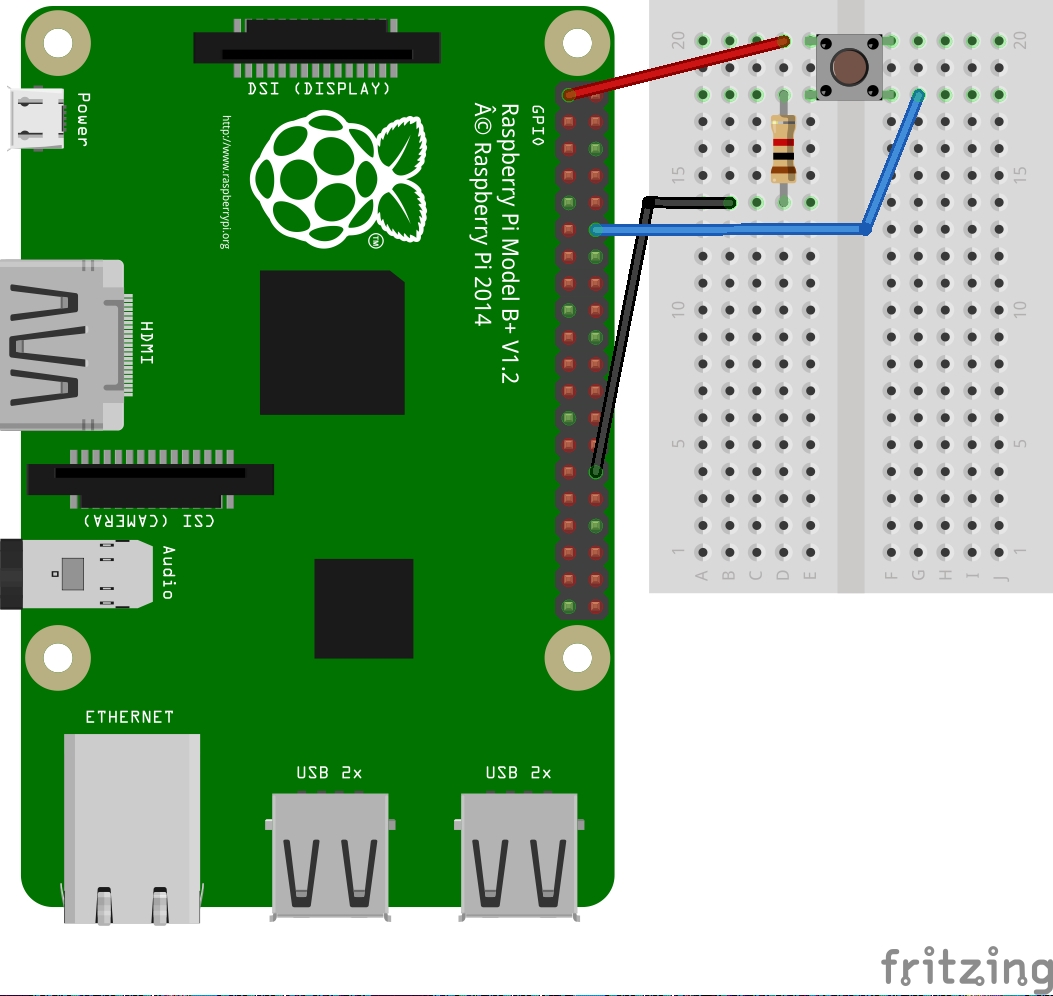
Connecting a button to the Raspbery Pi 2 is quite simple. You will need a a 1K resistor and a button. Connect the button to pin 16. You can learn more about the numbering conventions of the Raspberry PI 2 here: http://pi.gadgetoid.com/pinout
Programming Your Raspberry Pi 2 Using Node RED
If you haven’t yet installed Node RED in your Raspberry PI you can use our script to install and configure Node RED to run in your Raspberry Pi when you boot it up: http://developers.sensetecnic.com/article/install-node-red-in-a-raspberry-pi-2/
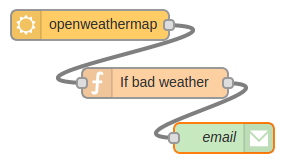
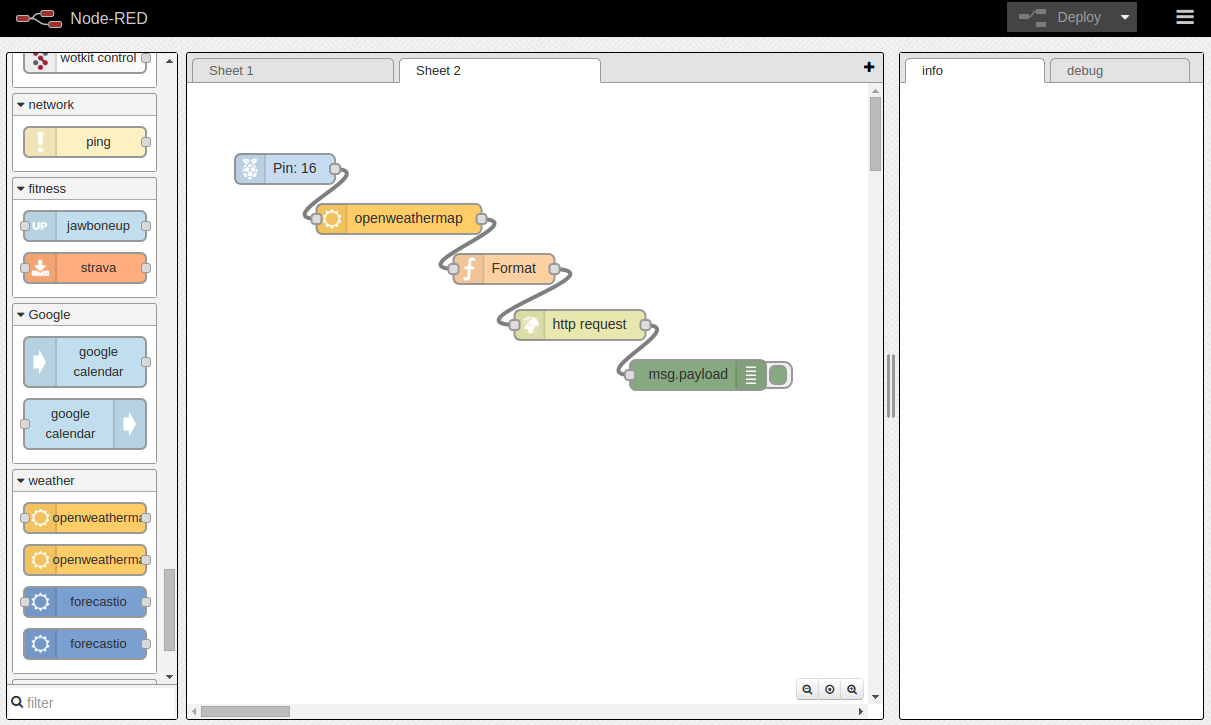
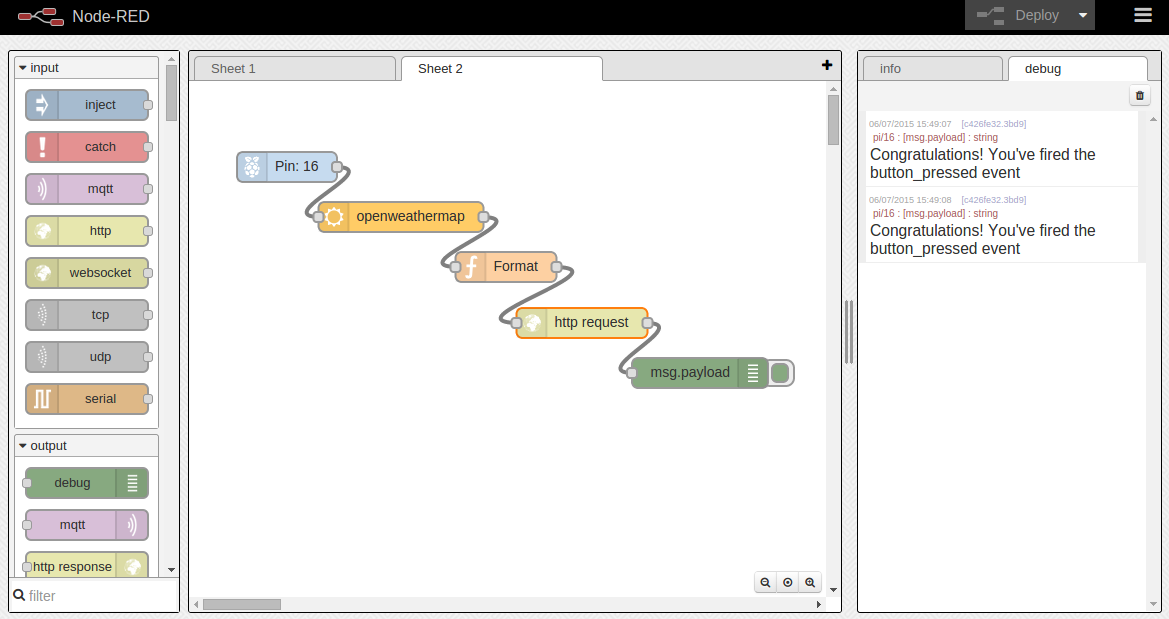
For this tutorial we will use a Raspberrry Pi GPIO node, an Open Weather Map node, a Function node, an HTTP Request node and a Debug node. Drag and drop them onto the main canvas and connect them like this:
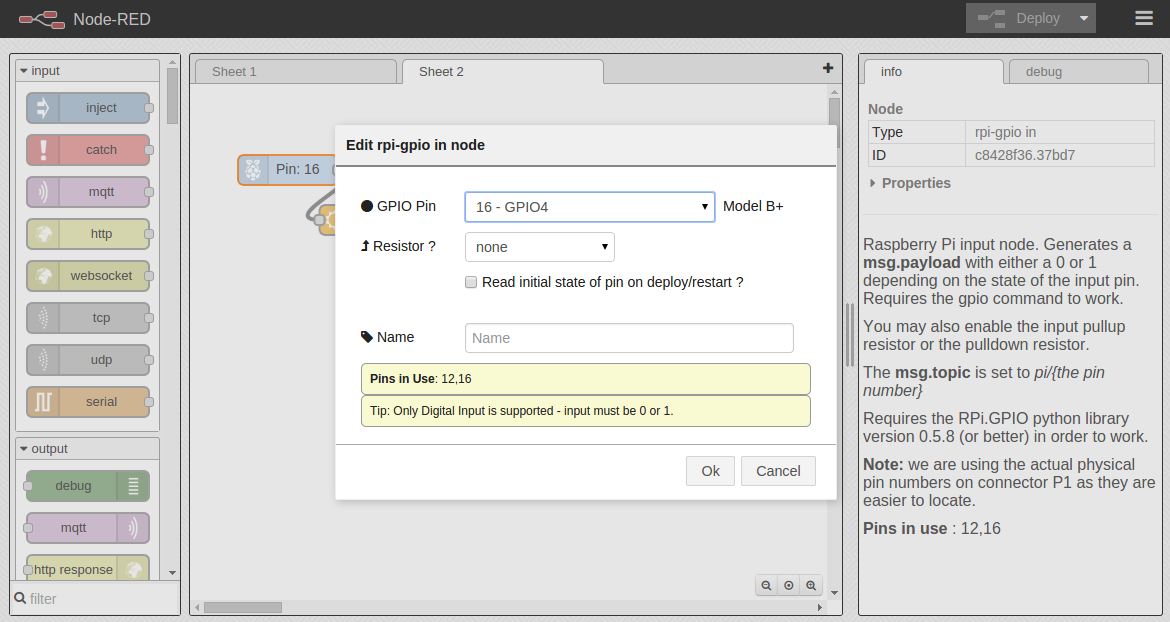
Let’s configure each one. Double click the Raspberry Pi GPIO node and configure it to use the pin 16 (GPIO4).
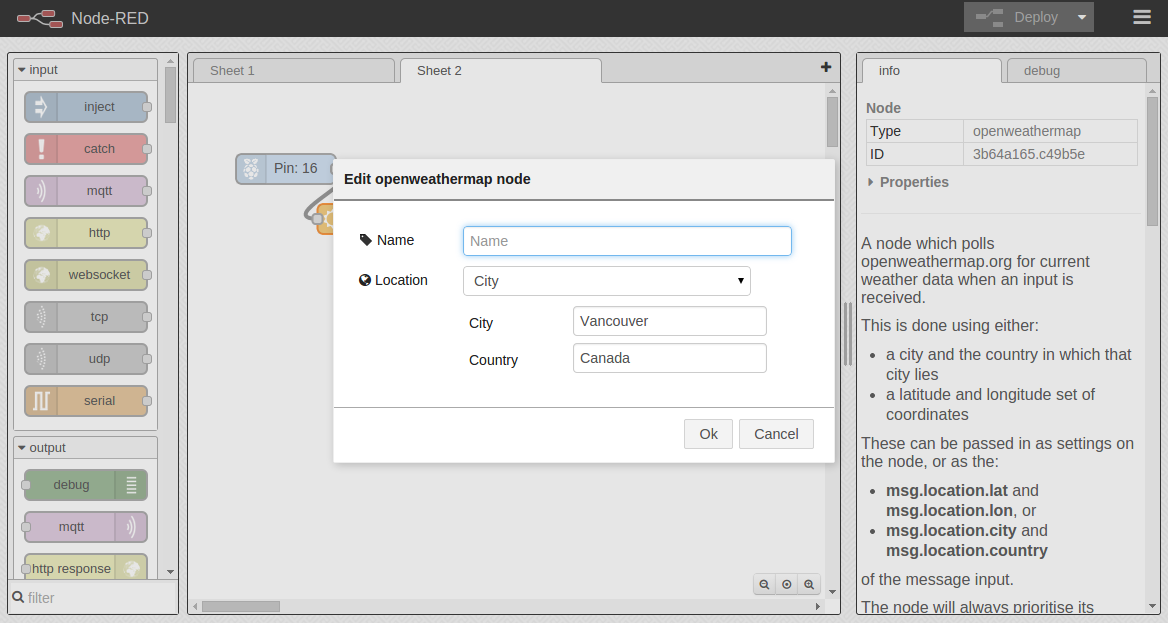
Configuring the Open Weather Map node is quite easy, double click on it and type your City and Country:
Double click on the Function node and paste the following code:
[javascript]
msg.payload = {
“value1″:msg.payload.tempc+” C”,
“value2″:msg.payload.tempk+” K”,
“value3”:msg.payload.location
}
return msg;
[/javascript]
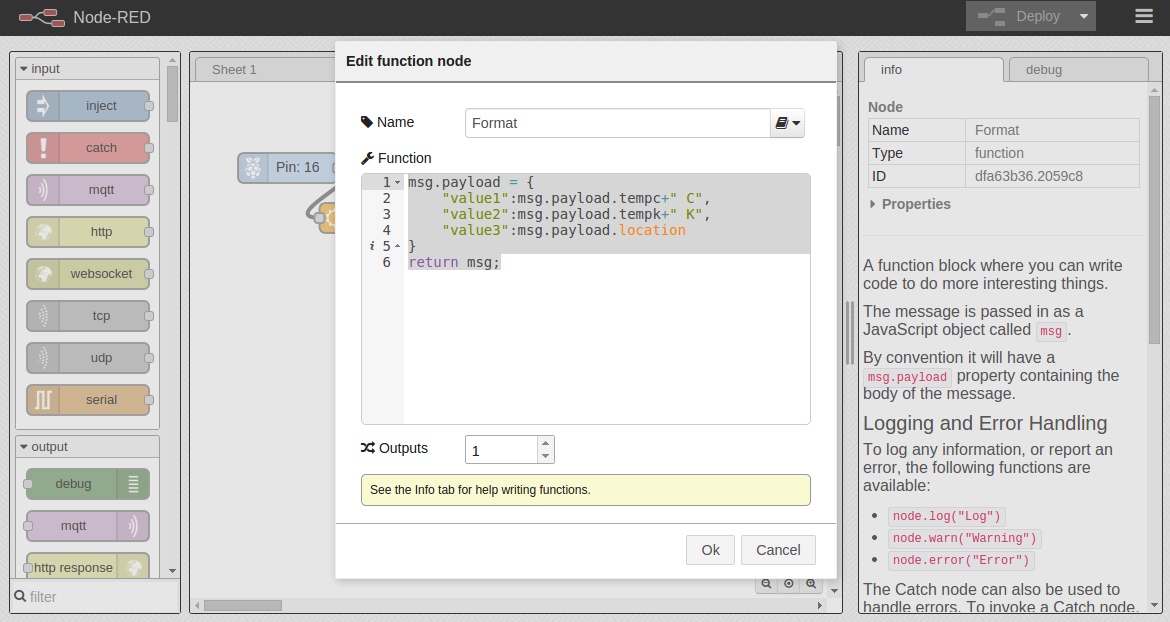
All this function does is format a message to be sent to IFTTT.com containing “value1”, “value2” and “value3”. We could have configured them to be more descriptive if we wanted to, but let’s keep them like that.
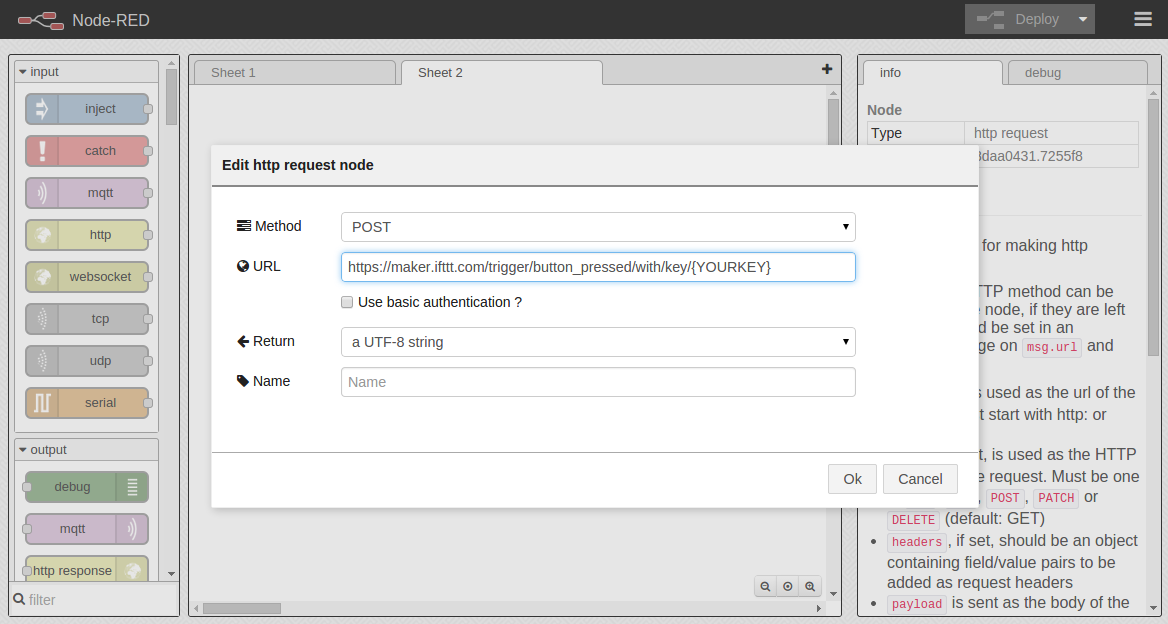
We are now ready to send this data to IFTTT.com, configure the HTTP Request node to send to the URL you can find at https://ifttt.com/maker under “how to trigger events”.
Finally, we will just use the debug button to receive some feedback to know if our event was sent. Click on “Deploy” to deploy your flow.
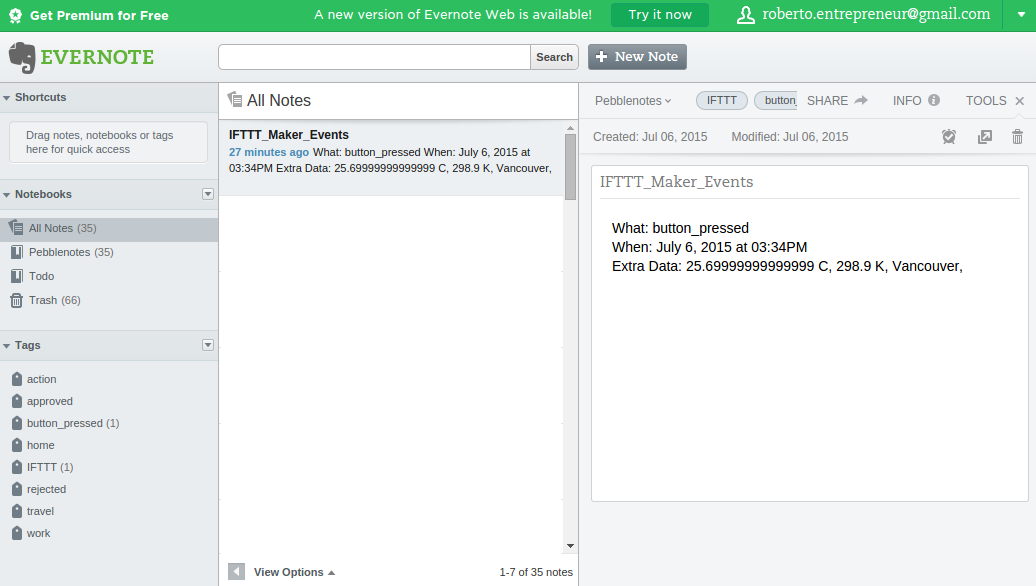
We are ready for the exciting part! Push the physical button on your board. You should see a message in the debug side panel saying “Contratulations! you’ve fired the button_pressed event” this is the response from the IFTTT.com server.
Visiting your Evernote account you will notice a new note called “IFTTT_Maker_Events” this note will have the data sent by our button. You can see the values added under the Extra Data line.