
Using the FRED node on a device (Pi, Artik, Edison, etc) to connect directly to Node-RED in the cloud
A lot of Node-RED developers want to use Node-RED on their devices (Pi, Artik, Edison etc) and also in the Cloud. FRED provides a cloud hosted Node-RED so it’s natural to want to connect your device flows to your FRED flows. Obviously you can do this by setting up websockets – or via MQTT – but we thought we’d make it easy for you!
We’ve created a new FRED node to make that connection easy – once setup and running, you can wire up a flow on a device that ends in a FRED node, and messages are then sent automatically to a FRED input node in the cloud – basically you can build flows that span device and cloud.
In this tutorial, we’ll explain how to install the FRED node on your client (Pi, Artik, Edison etc) and how to configure it to talk to your cloud Node-RED flow running on FRED.
The sample flows can be found in: https://github.com/SenseTecnic/tutorial-samples/tree/master/connecting-device-to-cloud
If you are not sure how to import a sample flow, please refer to: http://developers.sensetecnic.com/article/how-to-import-a-node-red-flow/
What is Node RED?
Node-RED is a visual tool for wiring the Internet of Things developed by IBM Emerging Technology and the open source community. Using Node-RED, developers wire up input, output and processing nodes to create flows to process data, control things, or send alerts. It works by allowing you to wire up web services or custom “nodes” to each other, or to things, to do things like:
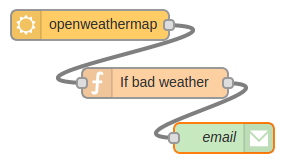
- Send an email on a rainy weather forecast.
- Push sensor data to services like Twitter.
- Perform complex analysis on data with ease.
If you’re new to Node RED you might find our Introduction to Node RED tutorial very helpful.
What is FRED
Front End for Node-RED (FRED) manages instances of Node-RED for multiple users in the cloud. We manage and optimize your instance of Node RED so you worry about accomplishing your project, not setting up and maintaining your Node-RED instance.
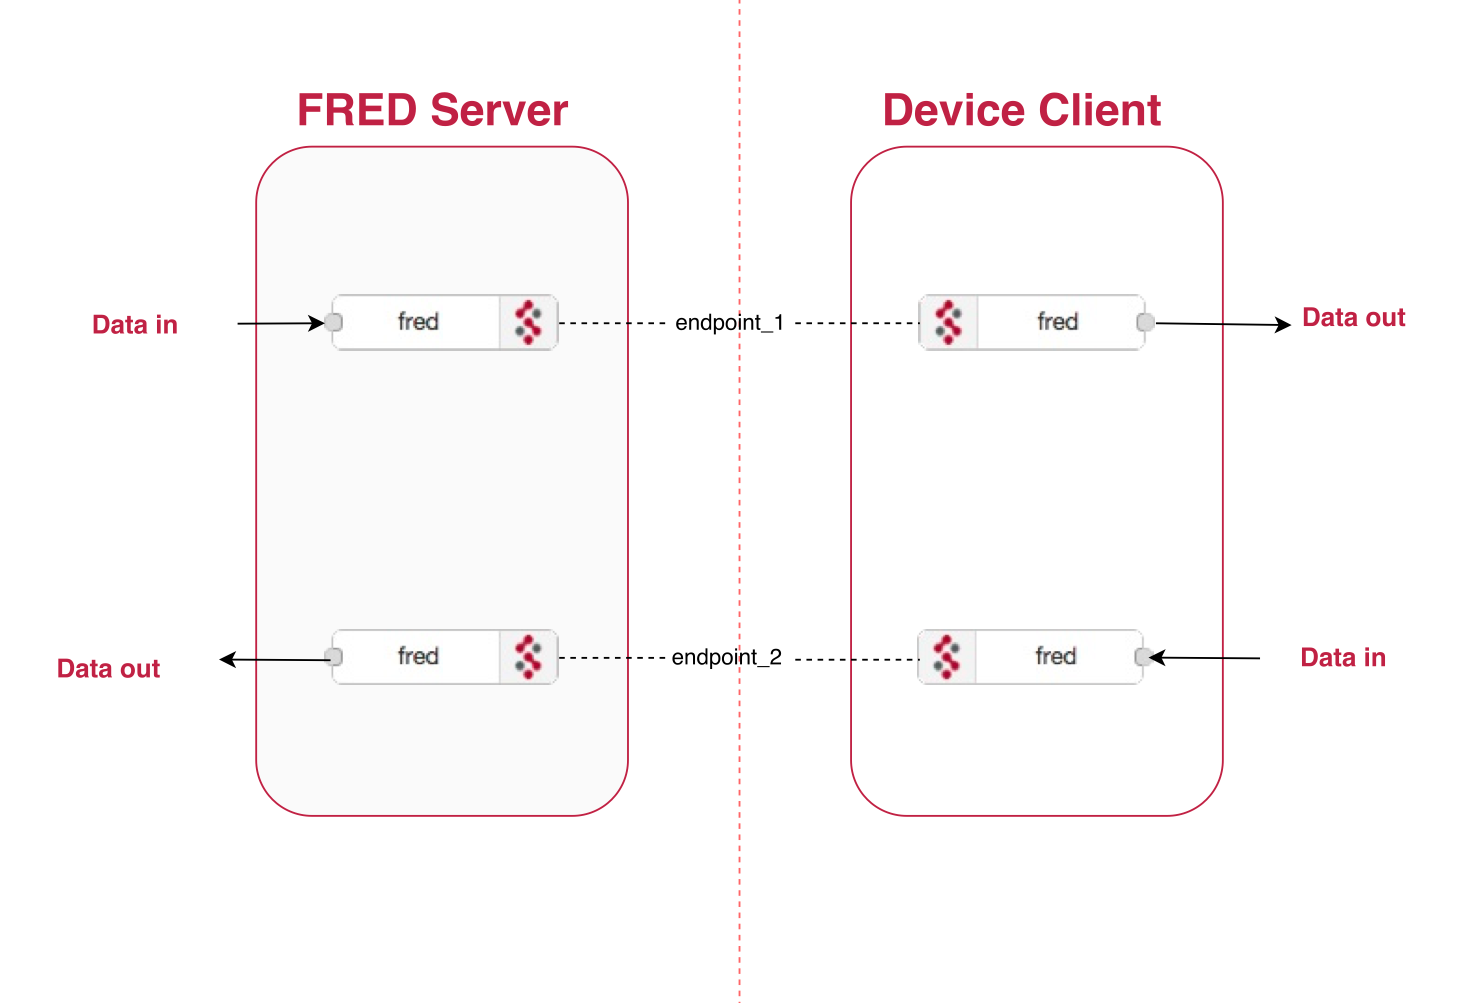
This is a high level illustration of the FRED node usage. We have both fred input node and fred output node on both the FRED server side and the device client side.
Create a FRED Account
To begin our tutorial create your own Node-RED instance in the cloud. Register for a free account at http://fred.sensetecnic.com.
After registering, make sure to activate your account via your email. You will not be able to login until you validate your account.
Installing the FRED node on your device client side.
The FRED cloud service already has the FRED server side node installed. However you will need to install the FRED client side node into Node-RED on your device.
The FRED client -side node can be installed using NPM install – in the same way you install other nodes – and is a snap to install. Simply run the following command in the directory you installed Node-RED on your device:
npm install node-red-contrib-
(Details are at: https://www.npmjs.com/package/node-red-contrib-fred)
Note: If you haven’t set up Node-RED on your device or not used NPM before, take a look at these pages from the official Node-RED docs. Setup and adding nodes
Once setup, restart Node-RED on your device and you will see the FRED nodes – one in the input section and one in the output section – drag a fred input node and a fred output node onto the canvas.
Once you have checked that the FRED nodes are available on your device, it’s time to begin setup. It’s important to start the setup on the server (FRED) side as the client side FRED node likes to have something to connect to. So head over FRED and let’s get started.
Configuring the FRED nodes on the server side – receiving data from the client
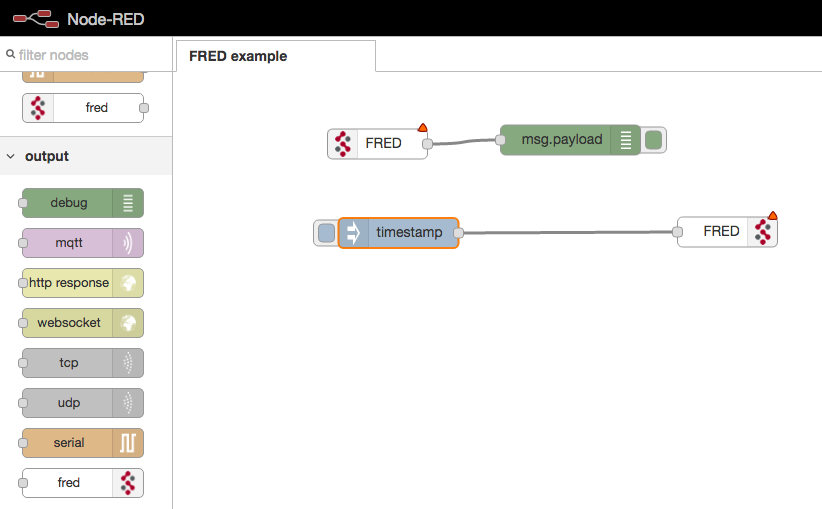
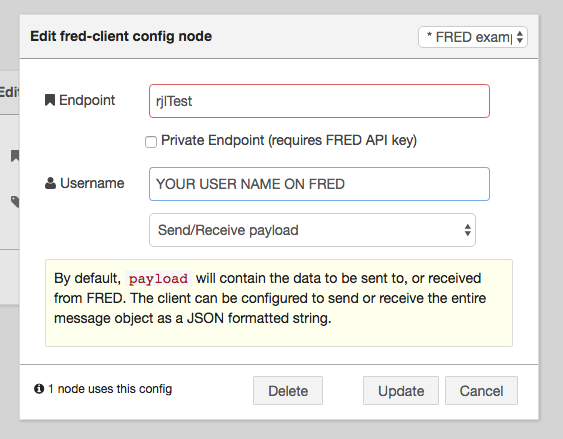
Once you are logged into the FRED service, drag a fred input node onto the canvas and attach a debug node. Then to configure the fred input node, double click and you’ll be presented with a configuration screen with two data fields, EndPoint and Name. The Endpoint is configured by selecting the edit icon and then providing a text name for the communications endpoint. In the example we are using “rjlTest” – you can use any name.
Once the Endpoint is created, select it and then give the node a name, we are using “Talk to device on rjlTest”.
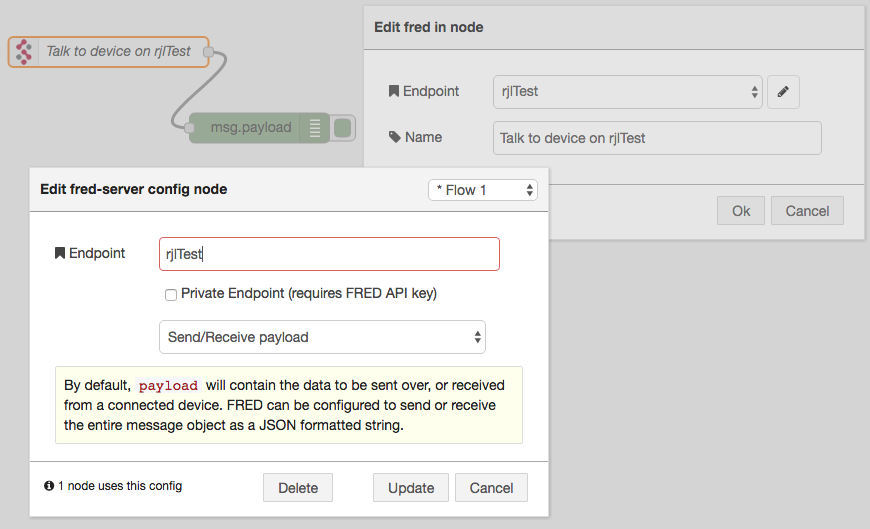
You will have seen that when creating the Endpoint, you had the option to leave it as a public Endpoint (the default) or, by checking the box, making it a private connection. We’ve opted for a public communication channel so didn’t need out FRED API key – we’ll discuss this option at the end of the tutorial.
Once you have finished configuring the node, deploy to the server. This will tell FRED to setup an endpoint for communications and it will listen on the endpoint (in this example rjlTest) waiting for input form any device side fred node.
At this point you can now return to your device and configure the device side fred node to connect to the cloud side we’ve just created.
Configuring the FRED nodes on the client side – sending data to the cloud
To configure the FRED nodes on your device, let’s start with the fred output node. First off, wire up an inject node (as shown above) to the fred output node. Then double click the fred ouput node so we can configure it.
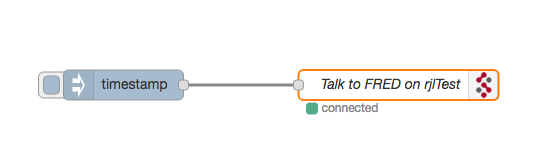
Give the node a name – I used “Talk to FRED on rjlTest”
Then click on the edit icon next to the Endpoint box and set up an endpoint for the server side and client side to use. For this you will use exactly the same endpoint you used on the FRED side (in our case “rjlTest”). It’s important to use the same endpoint because it is the communication Endpoint that the server side created and is currently listening on.
In this tutorial so far, we are using a public connection – so we don’t select the Private Endpoint checkbox. We’ll discuss that later.
.
In the Username filed, replace “YOUR USER NAME ON FRED” with your user name (login name) on the FRED system so that the node knows who to send data to. You didn’t need to do this on the server side, because you were already logged into FRED so it already knows your name. However on a standalone device instance of Node-RED the node needs to know your FRED user name.
Leave the Send/Receive payload as is, which tells the fred node to just send the message payload it receives – you can change it to sending the entire message if that is needed. Once setup, your flow will look like this.
Note that before you deploy the client side flow, you will not see the connected icon below the node – it only appears after you deploy and the node connects to the FRED side server node.
Testing the device side: send data to the connected FRED node.
To test it, on the device side, check that the status “connected” is shown and now click on the timestamp (input node) a few times to send a few timestamps as message to the fred input node – the fred input node will then pass those timestamp messages through to the flow running on the FRED server. You can verify by going back to FRED and looking at the debug node to make sure the timestamps have successfully turned up!
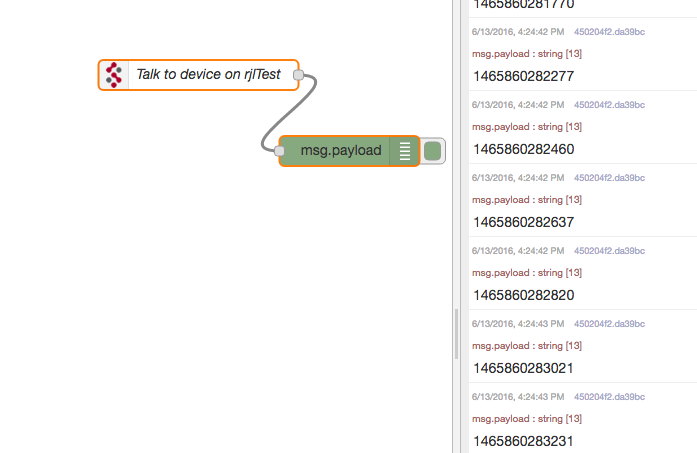
As you can see, we now have data messages flowing from the device Node-RED directly to the FRED side!
Setting up FRED nodes to send data from the server side to the device client side
So far, we set up a one way connection from the device to FRED – each connection is ‘unidirectional’, i.e. it only passes messages in one direction. Now let’s set up another unidirectional connection but this time from the FRED side to the device side – you can think of this as the other half of a two way connection.
Setting up the fred nodes to talk the other way is as simple as following the same steps – start on the FRED side by dragging a fred out node and configuring it with a timestamp node. Click on the fred output node and configure it as before. You will need to create a new endpoint, so add a new endpoint and give it a name – we use rjlTest2 in this example.
NOTE: it is important to use a different EndPoint name from the EndPoint used for the “device to FRED” communication. If you chose the same name (which is possible) then you will cause the system to generate communication errors.
In addition, instead of just sending the payload, select the entire message so we can use the topic field to differentiate this message.
Then switch to Node-RED on the device side and on your device, drag a fred input node onto the canvas, wire it up to a debug node. Configure the fred input node to listen on the same endpoint and deploy.
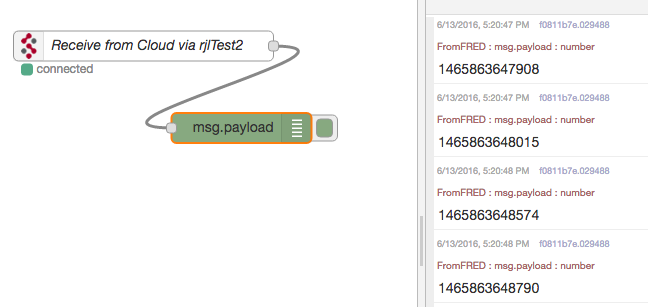
Now, on FRED server side, click on the timestamp inject nodes a few times and you’ll see the full message appear in the debug pane of your device side including the topic (set to a null field), the payload with the timestamp and a null msgid.
If you now go to the FRED server side and configure the timestamp node to use a topic field, let’s use “FromFRED” – and redeploy – when you hit the inject node on the FRED side, you’ll see the new topic appear in messages in the debug pane on the device side.
That’s it – you’ve successfully set up a two way communication between Node-RED on your device and Node-RED in the cloud (FRED). After this you can experiment with sending data from your hardware pins of your Pi or Edison directly into the cloud and then processing them in your FRED flows.
Multiple devices using a single Endpoint
The FRED side node is acting as a server endpoint for a single device/client in the example we’ve set up. However, there is nothing to stop you having many device side fred nodes, or in fact, many devices, each with many fred nodes, all talking to the same service side FRED node. In fact that is common pattern for IoT apps that use FRED as the cloud backend and a number of Node-RED devices connecting and sending sensor data.
Private versus public Endpoints
By default, the Endpoints you create are public – that means that technically anybody, if they have your EndPoint name, can configure a node to talk to your server side node. If that’s not something you want, then you can protect your endpoint by making it private. As mentioned above, if you select the private Endpoint then you will need to enter your FRED API key. This will secure the communication channel and only allow authenticated connections.
You may want to experiment with using private endpoints, to do that, simply configure your device side and FRED side nodes with your FRED API key which you can find by selecting Profile in the FRED status panel on the left of the Node-RED UI.