
The new Pi Zero W is a great hardware platform for creating all kinds of interesting hardware gadgets. With built in bluetooth, wifi, and a camera connector, it seems like the ideal system for creating a security cam. Of course one of the best things about the Pi Zero is that it runs Node-RED!
Here we’ll outline you we can trigger the Pi camera for remote monitoring using Node-RED running on the Pi. Then we will we will show you how to use the FRED cloud hosted Node-RED platform and the Sense Tecnic MQTT service to trigger and view the camera from any location and integrate the camera image in a dashboard.
Setting up the Pi Zero Camera and the Network
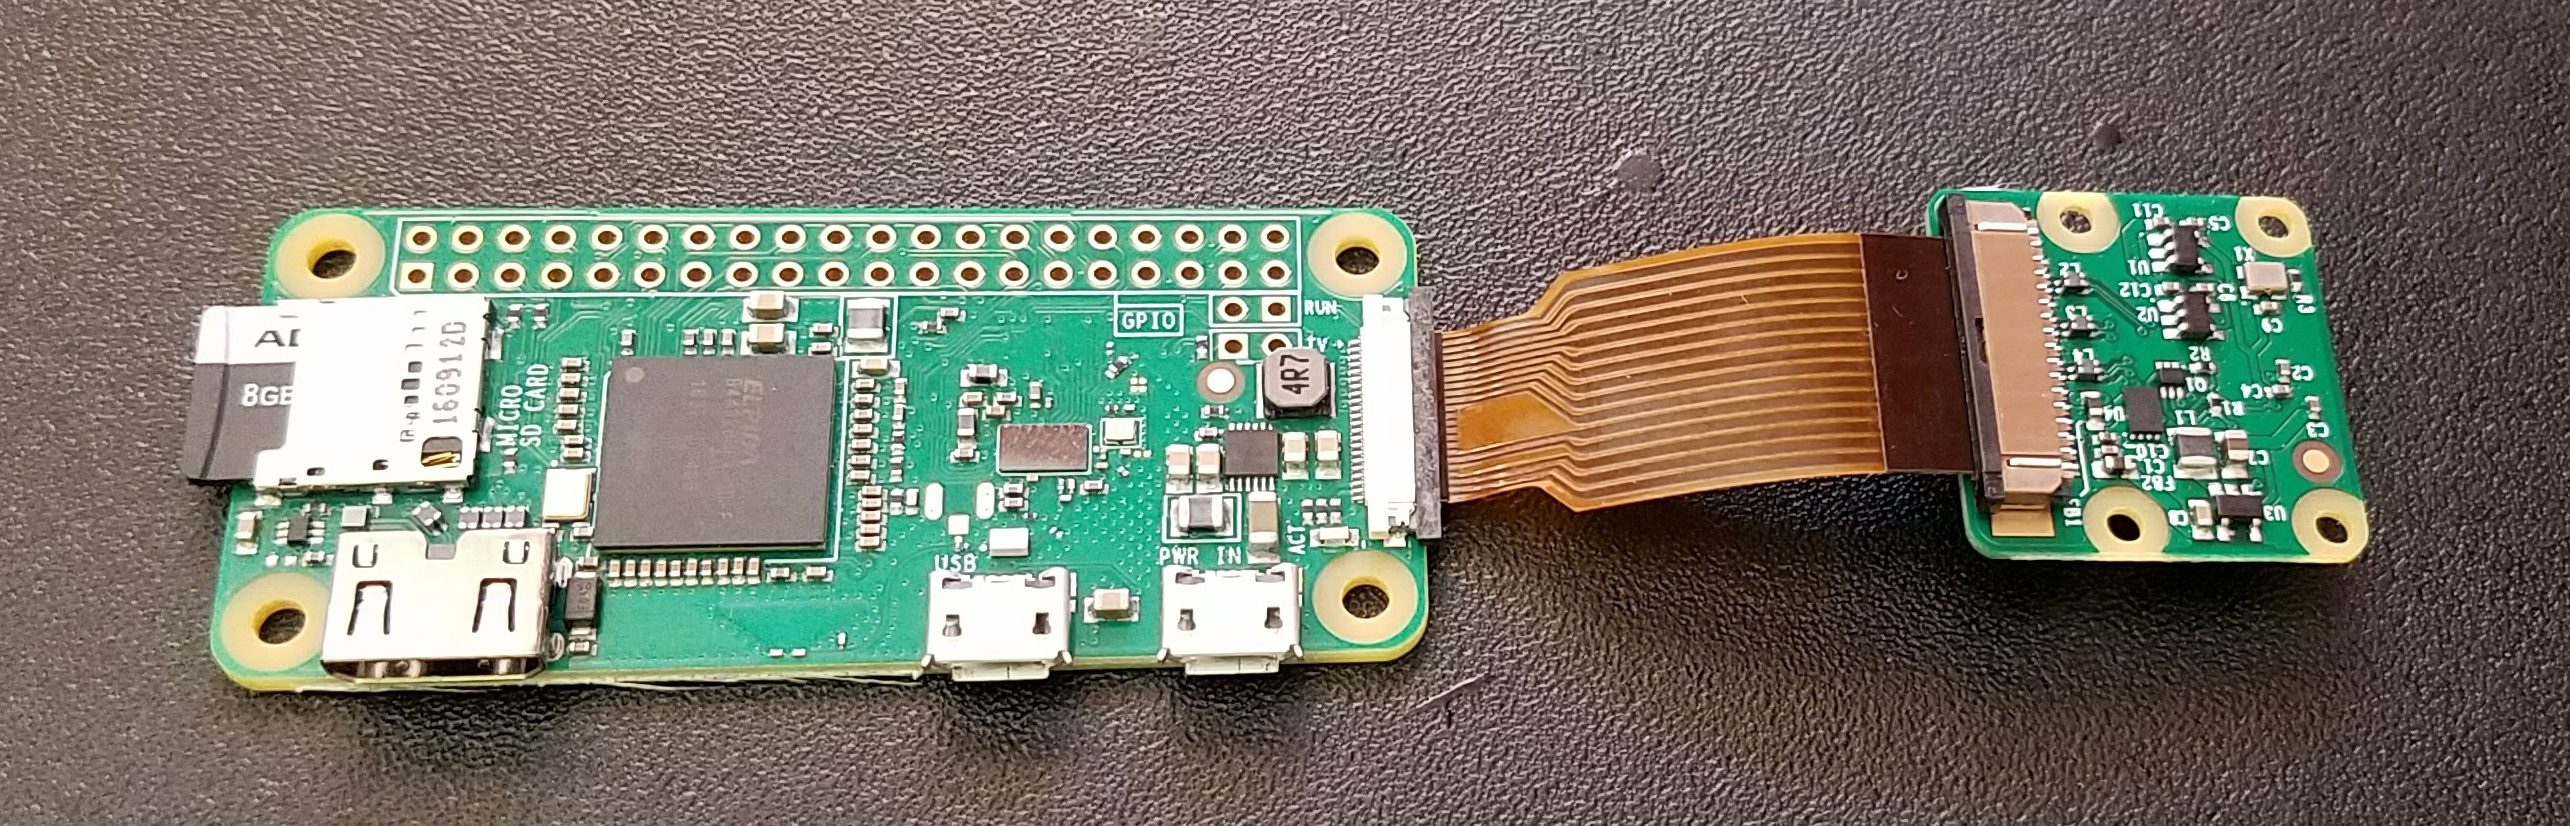
First, the hardware. Now that the Pi Zero has a camera connector, it’s pretty simple to connect the camera to the system. You can purchase a camera from a number of vendors. This is the camera we used available from Amazon.

Note that you’ll need a new cable since the Pi Zero connector is a little different. This one from Amazon is similar to the one I got with the MagPi magazine.
You install the camera as shown by connecting the camera with the cable.
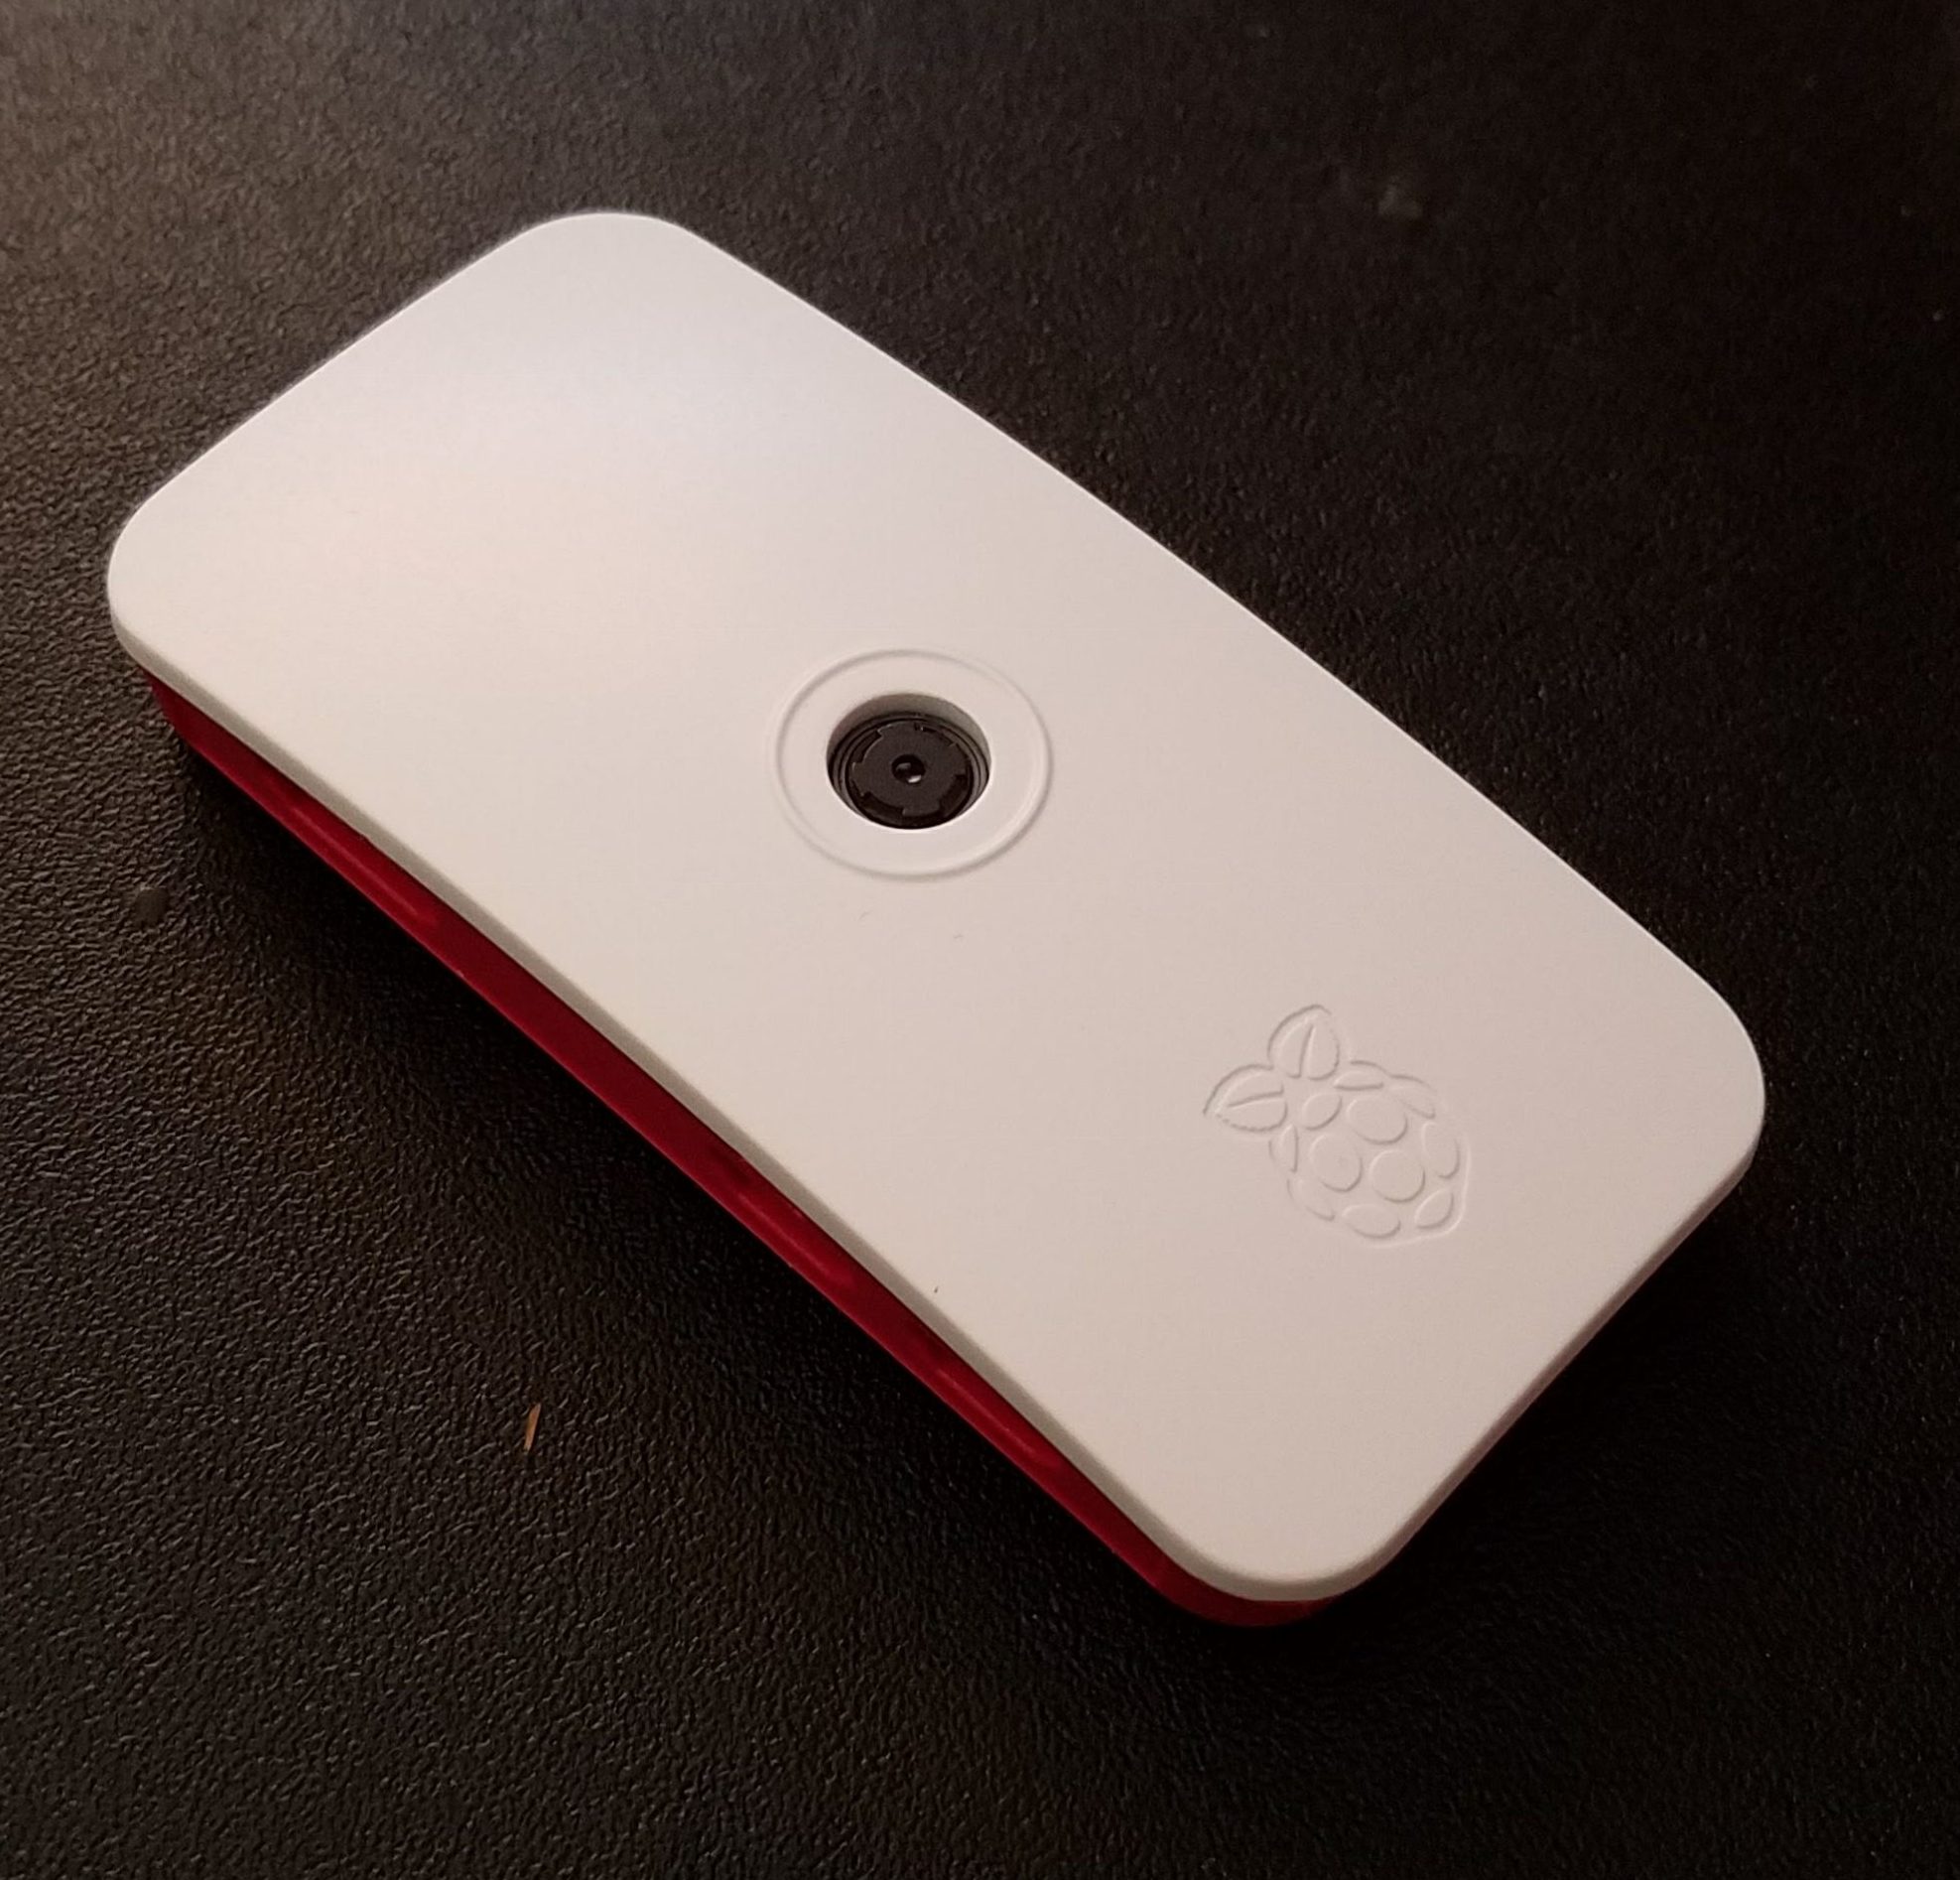
If you’ve got a nice case like the one supplied with the MagPi, it looks pretty cool in its box.
Like every other Pi system, you’ll need a power supply, and a MicroSD card for the OS. At first you’ll probably want to connect a display and keyboard so you can configure the Pi to connect to your WiFi LAN. You’ll probably want to download the latest Raspian OS. The graphical tool called Etcher is great for writing the image to an SD card.
Once you have the hardware and software installed, you’ll want to make sure the Raspian OS is up to date. To do this type the following at the command prompt:
sudo apt-get update
sudo apt-get upgrade
Make sure the Pi is on your network. Using the GUI you can get the IP address of the pi by hovering over the WiFi symbol in the top menu bar, or by typing hostname -I in the console. Jot down the IP address – you will need it later.
Raspian comes with Node-RED but you might want to upgrade to the latest using the Node-RED upgrade script. For more information see the Node-RED Raspberry Pi documentation. This command should do it:
node-red-upgrade
Next, you need to enable the camera using the rasp-config utility. Run this from the console:
sudo raspi-config
You should see the enable/disable camera option. Enable the camera. Now, lets boot up Node-RED. Click on the Pi icon->Programming->Node-RED icon in the menu bar. A console should appear with familiar output indicating Node-RED is up and running:
Welcome to Node-RED
===================
4 Sep 22:30:00 - [info] Node-RED version: v0.17.3
4 Sep 22:30:00 - [info] Node.js version: v6.11.0
4 Sep 22:30:00 - [info] Linux 4.9.35+ arm LE
4 Sep 22:30:05 - [info] Loading palette nodes
4 Sep 22:30:26 - [info] Settings file : /home/pi/.node-red/settings.js
4 Sep 22:30:26 - [info] User directory : /home/pi/.node-red
4 Sep 22:30:26 - [info] Flows file : /home/pi/.node-red/flows_pi-zero-cam.json
4 Sep 22:30:27 - [info] Server now running at http://127.0.0.1:1880/
4 Sep 22:30:27 - [info] Starting flows
4 Sep 22:30:28 - [info] Started flows
Now, from your PC on the same LAN, open your favourite browser to bring up the Node-RED editor. For example, if your Pi’s local IP address is 10.0.0.111, you would use http://10.0.0.111:1880. You should get a blank Node-RED canvas to start to work on.
Next we’ll install a node to communicate with the camera. Fortunately @ohan has made one available at https://www.npmjs.com/package/node-red-contrib-camerapi
In Node-RED click on Manage Pallette in the menu bar, then click on the Pallette/Install tabs and type camera to find the camera node. Click on install as I have done below. Once the node is installed, the camerapi node should appear in the pallette.

Camera Web Server Flow
First we will use Node-RED on the Pi as a web server to serve up fresh images from the camera. When you send HTTP requests, it will respond with a picture from the camera. To do this we’ll create a flow as shown below.
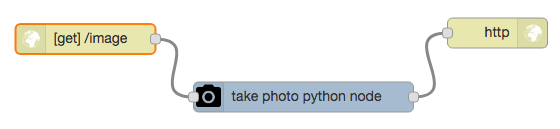
In this flow, an HTTP request node triggers the camera node to take a picture and respond with the image. The HTTP input node is configured to use the GET method with the URL /image.
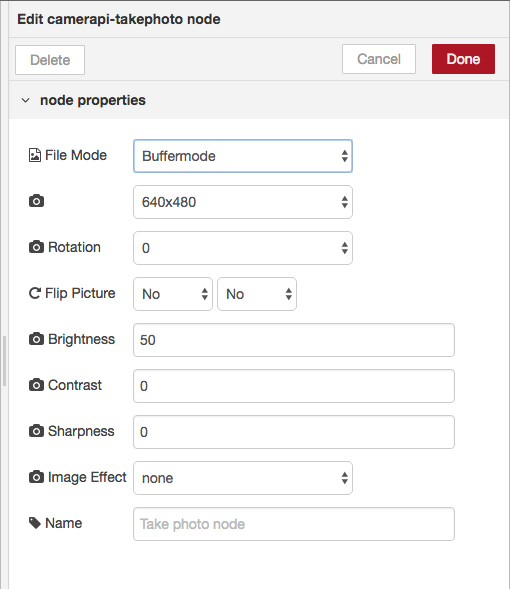
Next, we configure the camera to take fairly low resolution images for now, and send them in the message payload as follows
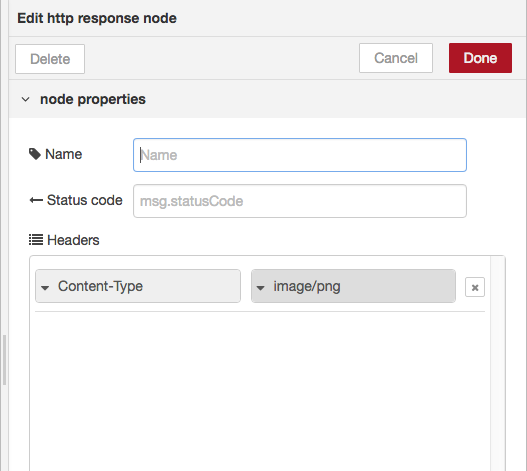
Finally we need to configure the http response node to send the right content type, in our case ‘image/png’ as shown
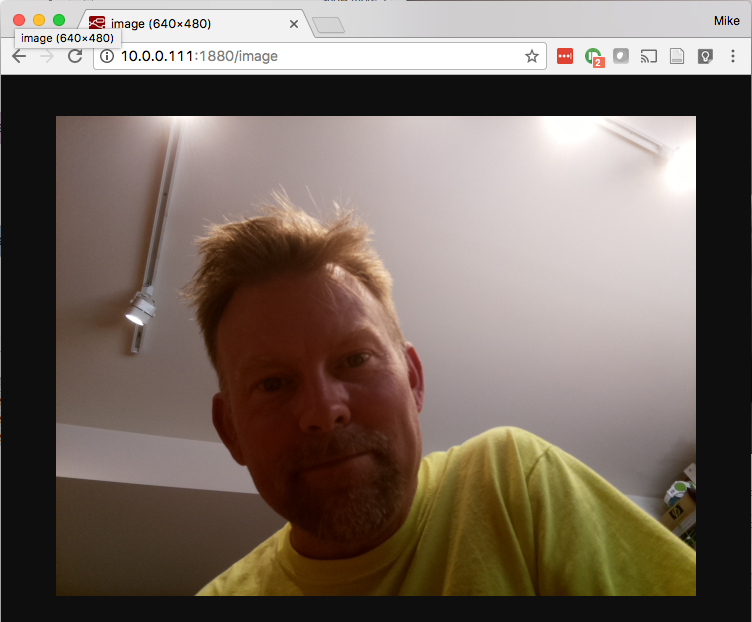
That should do it. To test it out, deploy the flow and open up another web browser page. Hit the URL 10.0.0.111:1880/image (replace my IP address with yours) and you should see an image.
Now you can use this image in any web application by supplying the URL. Of course, this web server is running behind your LAN firewall, so you won’t be able to access it from outside world. One approach to solving this is to open up a port in your firewall, but this has its own security issues. To address this we can create a flow that pushes images to the FRED cloud hosted Node-RED server on request, using MQTT and HTTP.
Pushing Images to the FRED Cloud Service
Using FRED and Node-RED running on a Pi, you can take remote pictures and display them on a dashboard without the need to open your firewall.
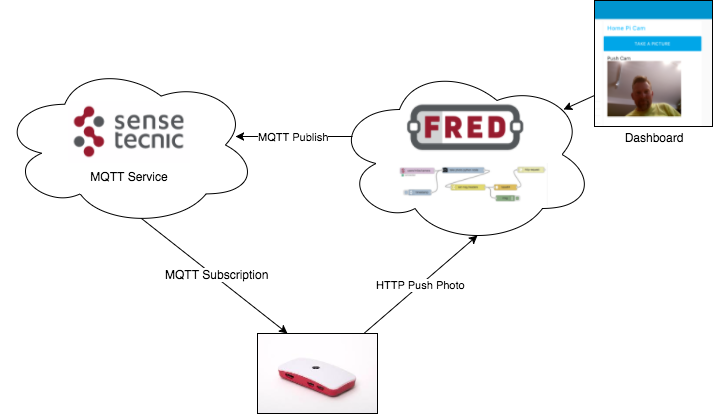
First you’ll need to create a simple dashboard with a button and an image template. When you hit the button, you will signal the pi to take a photo and send it to FRED. The basic deployment is shown below. We’ll signal the Pi to upload a photo using MQTT, and the camera will upload a new image to FRED using HTTP.
Note that the STS-MQTT service requires a paid subscription to FRED. To upgrade your account, hit the upgrade button when logged into your free FRED account. Or Contact Sense Tecnic if you want more info or need some help.
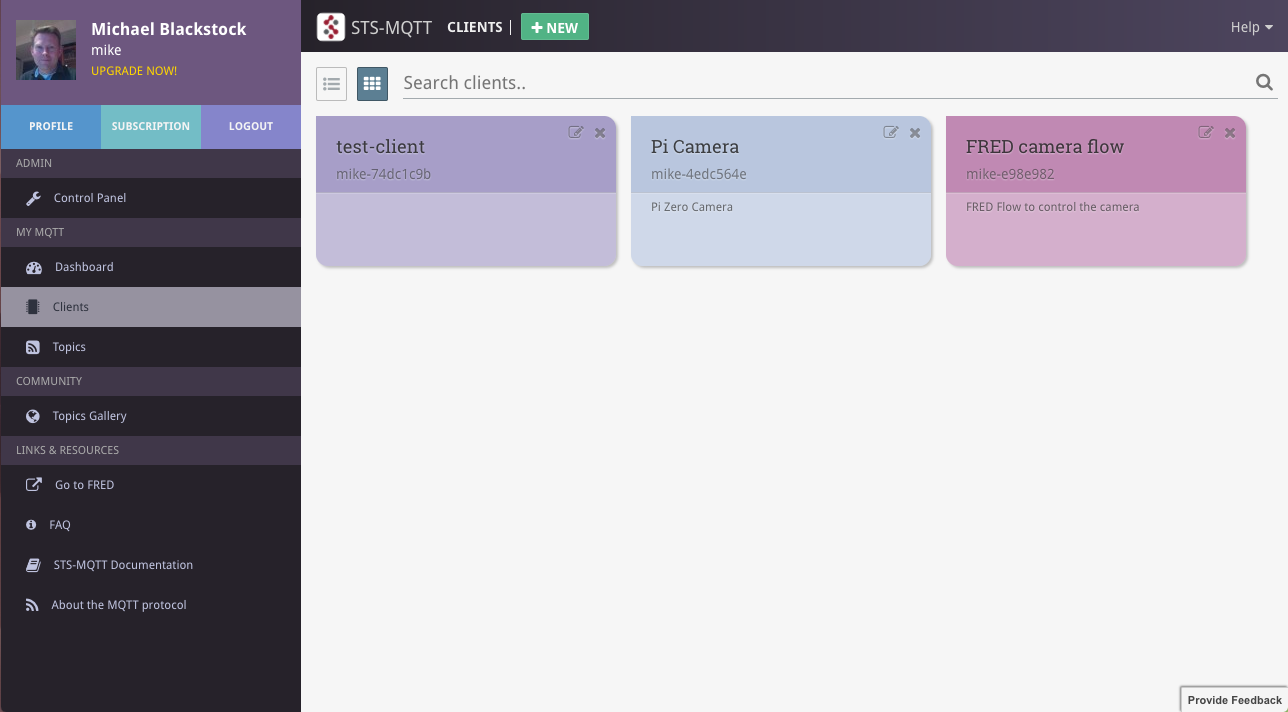
First, we’ll set up our Node-RED instance on FRED and the Pi to communicate via the STS-MQTT broker. To do this, we create two clients on the broker, one for the FRED connection and one for the Pi. Log into the STS MQTT service console, click on + New button to create new clients. One will be called Fred Camera Flow and the other Pi Camera. Jot down the client id’s and the keys – you need these for the MQTT configurations. After creating your clients your MQTT console will look as follows.
Next we’ll create a simple flow on FRED to send messages to the Pi when the dashboard users clicks on a button. First, ensure the Dashboard nodes are installed on your FRED instance as shown.
Next, we’ll add a dashboard button UI node, and an MQTT output node to signal the camera as shown.
![]()
We configured the MQTT node to connect to the MQTT service using the Fred Camera Flow client id and key. We’ll use the topic
users/mike/camera
to publish signals to the camera. (In your own setup you will substitute your account name for mike.). Now, when the user clicks on the dashboard button a message will be sent to this topic.
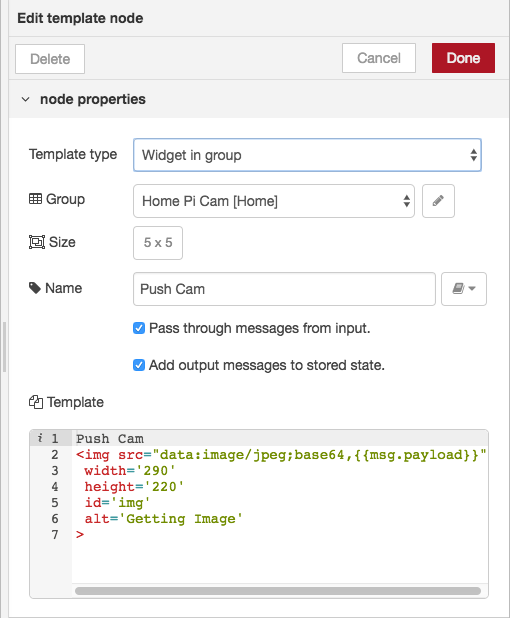
Next, let’s set up a FRED flow using HTTP and a template widget to display the photo when it is uploaded.
On FRED, we added an HTTP input node that accepts images sent to /api/camera. The template node is configured as follows to display the image in the message payload.
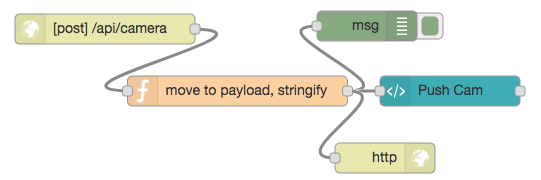
The next step is to set up the Node-RED flow on the camera to receive MQTT messages from FRED to trigger the photo, and then send it off to FRED using HTTP. This flow looks like the following.
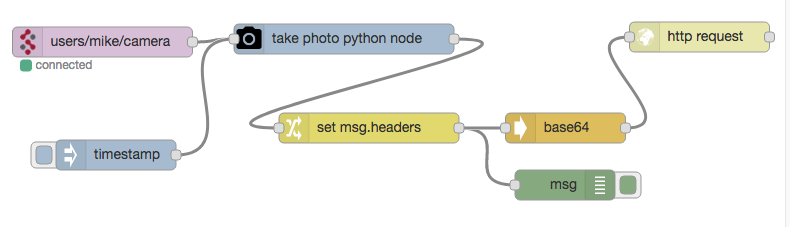
In this flow, we have a Change node to set message headers containing our FRED API credentials so we can POST our image to a private FRED HTTP input node. We have also used the base64 node to encoded the image before sending it over HTTP. The inject and debug nodes are for testing and debugging.
If all is wired up and configured correctly, when we click on the button in the dashboard, a photo will be uploaded a few seconds later. We can update the photo any time we like by clicking on the button.
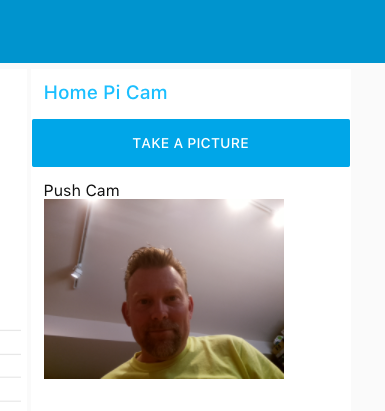
With this setup we can monitor a remote location by taking a photo any time we want. This setup could be extended to control servos to move the camera around on demand, or to detect an intruder using a motion sensor on the Pi and take photos automatically. Your imagination is the limit!
Summary
In this post, we showed you how to use a raspberry pi camera with Node-RED and how to use the FRED service and MQTT to signal the Pi to take photos for security and other applications and display images on a dashboard. We glossed over some of the details here, so if you have any questions, we’d be glad to help you out. Contact Sense Tecnic if you have any questions about this example, or would like assistance creating any of your IoT applications.