
This tutorial will show you how to use FRED — a cloud-based Node-RED — with the IBM Watson cognitive services. We will be using the node-red-node-watson module developed by IBM, Continue reading “Tutorial: use the Watson cognitive service with FRED (Cloud Node-RED)”
Tag: IBM watson
Tutorial: Using FRED (Cloud Node-RED) to build an AI chatbot using IBM Watson
This tutorial shows you how to use FRED — a cloud-based Node-RED — to build an AI chatbot using the IBM Watson Conversation service as the Natural Language Understanding (NLU) agent.
Building a smart chatbot can be complex. In this tutorial, we will show you how to build an AI chat bot by writing a Node-RED flow on the cloud-service (FRED) that can handle multiple users and maintain the context of conversations on the cloud server. We will be using the node-red-contrib-chatbot node and the node-red-node-watson node. We will also show you how to set up the IBM Watson Conversation service and use it to interpret natural English language input from users. Finally, we will use the Walmart database API in the tutorial sample for product information.
Node-RED provides a great way to connect various messenger platforms to online AI services, and it is capable of performing various processing tasks upon receiving requests from users. This is what makes a Node-RED AI chatbot exciting.
We have provided sample code here. If you do not know how to import flows, you can refer to this article.
Create a FRED Account
If you don’t already have an account on FRED (Cloud Node-RED), set one up now. It’s free for a demo account, which can be used for these tutorials and any other experiments you may have with Node-RED. Register for a free account at http://fred.sensetecnic.com.
After registering, make sure to activate your account via your email. You will not be able to log in until you validate your account.
About IBM Watson Conversation
IBM Watson is a growing software platform that provides easy access to artificial intelligent (AI) services for commercial and development usages. The Watson Conversation service is one of the Watson applications that uses machine learning to understand and interpret natural human language input and to output the appropriate response to simulate a natural conversation between humans. Developers can supply data and train the conversation application as defined for various purposes. Therefore, by using the IBM Watson Conversation service, a chatbot can both output correct analytic data to software applications and natural human language to users.
About Sense Tecnic: Sense Tecnic Systems Inc have been building IoT applications and services since 2010. We provide FRED, cloud hosted Node-RED as a service to the community. We also offer a commercial version to our customers, as well as professional services. Learn more.
The user story for this tutorial
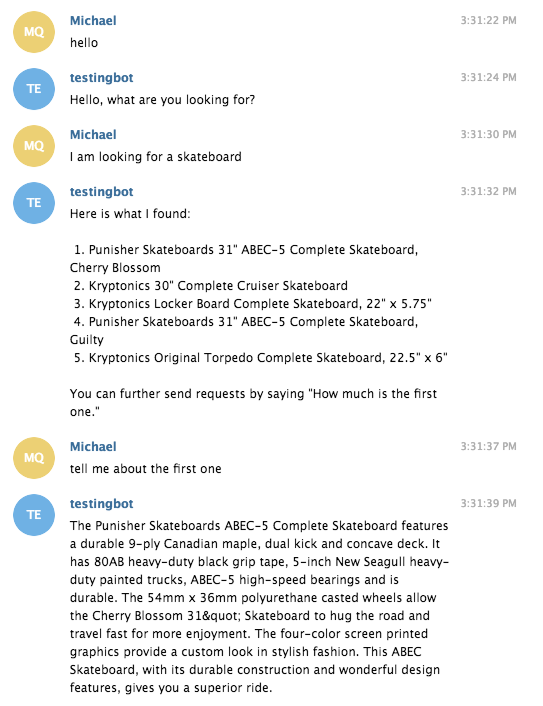
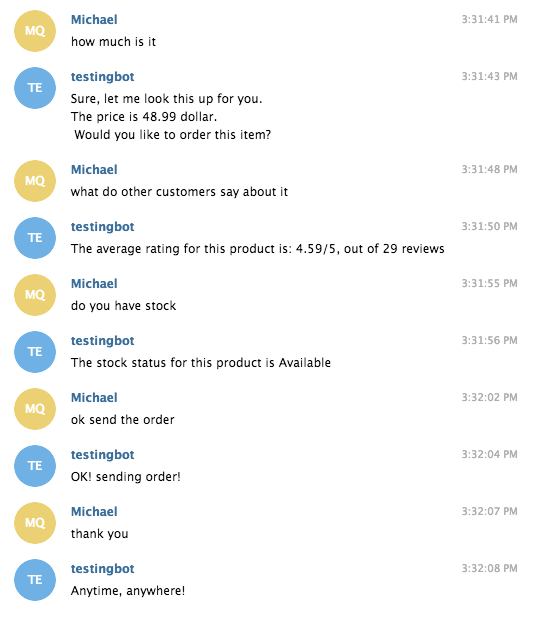
A local shop has decided to expand their online chatbot services for quick and easy access to their products. When customers initiate the conversation, they can ask the chatbot to recommend products by searching its database of products (which we mock-up using the Walmart online database). Users can further ask the chatbot about the price, product details, customer reviews, stock, and send orders online.
They decided to set this up by using FRED to implement a Node-RED back-end process, various messenger platforms (as front-end, we are using telegram in this case) and IBM Watson Conversation for the natural language interpreter, which interprets the natural language input from customers.
Quick peek of the result
Data flow of this tutorial chatbot

Prerequisites
To create an AI chatbot as in this sample, you will need the following:
- If you don’t already have a free FRED account, set one up
- If you don’t already have an IBM Watson account, set one up
- We will be using Telegram as the messenger platform. If you don’t have an account, set one up
- We will use the Walmart database API for the mocked sample. If you don’t have access, sign up for an account here
- Once you are setup, you can import the sample Node-RED flows from here
Outline of the tutorial
- Setup Watson Conversation application
- Create a new chatbot on Telegram
- Connect Telegram messenger to FRED
- Connect FRED to the Watson Conversation application
- Write a Node-RED flow on FRED that handles requests from the users, and supplies the correct response
Setup Watson Conversation application
Once you have setup your IBM Watson account, you can go to the Watson Conversation workspace. We have prepared a sample JSON file for you here. You can simply import the sample application to get it working right away. We will briefly explain what this application does later on.
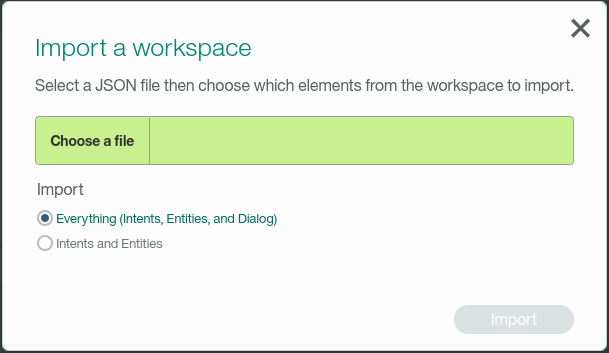
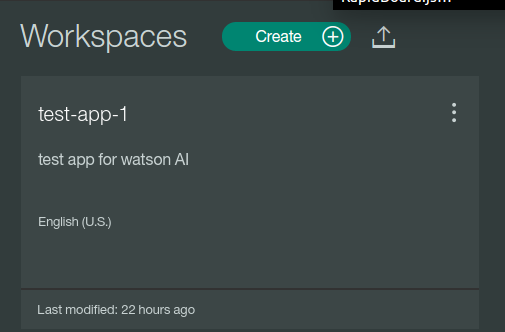
When you are in your workspace, you will see these at the top.

Click the Up arrow to upload a JSON file.
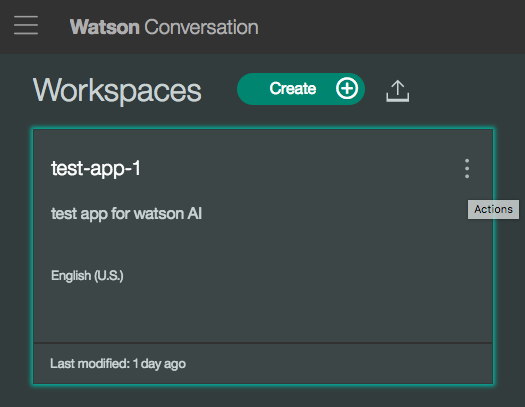
Once it is done. You will see this app in your workspace.
When you click this app, you will be able to see the contents in the app. There are three main tabs in this app, the Intents, the Entities, and the Dialog.
- Intents: These are the user defined actions, and their names begin with # in a Watson Conversation. We have set up 9 intents in the sample app, including: #getReviews, #getDetails, #checkPrice, #checkOnlineStock, #order, #searchItems, #greeting, #goodbye, #thankyou.
Normally, when you start a new conversation application, you need to train the Watson application to interpret users’ input and be able to match this input with the correct intents.
- Entities: These are the user defined “keywords” that the Watson Conversation program can recognize in the conversations. It’s important for Watson to pick up the keywords in the conversation, and it helps us in implementing the chatbot.
Since our goal is to set up a smart inventory inquiry chatbot, it is necessary for the bot to pick up all possible words that could be used in searching. We had done some data processing in the “category” field, with their possible synonyms in natural conversations. Don’t be scared by the amount of words. These words were taken from the Walmart taxonomy API.
- Dialog: These set the possible responses from the bot when a user enter inputs. Watson Conversation provides a visual editor for users to design their dialog flow. Since we have quite a few intents, it would be complex to design subdialog nodes for each intent. (You will have to map all possible dialog flows, otherwise the bot might not know what to response when users change the topic! ) We decided to have all dialog nodes at the root level, and let FRED maintain the conversation context.
Once you’ve uploaded the application, you will need to train your program with the data supplied. Watson should automatically starts the training process. You can check the status by clicking this button on the top right corner to open the dialog window:

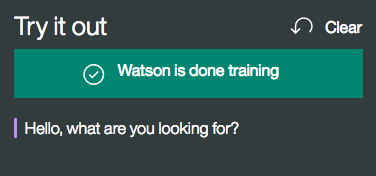
and you will see Watson is training with the data you supplied:

It wouldn’t take long before you see this showing up indicating the training process is complete:
Once Watson finishes training the conversation application, we can leave it for now and move to the next step.
Create a new chatbot on Telegram
We are using Telegram as the messenger platform for this tutorial merely because is simple and quick to setup. In fact, you are more than welcome to use any messenger platforms you want as long as you can connect to FRED. Telegram has thorough instructions on how to setup a chatbot using Botfather here.
Connect Telegram messenger to FRED
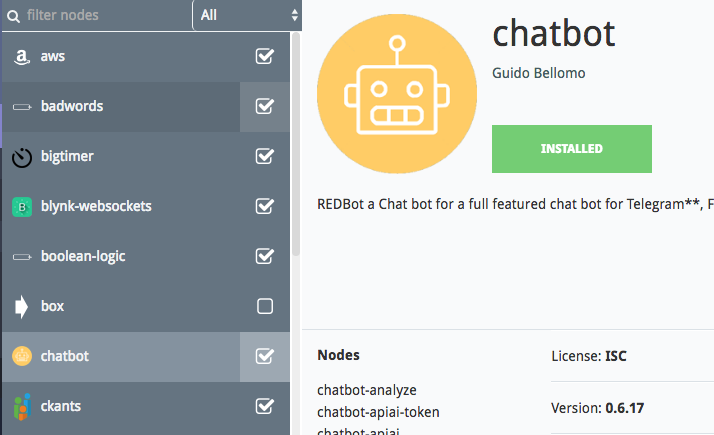
To connect the telegram chatbot to FRED, we will need to install node-red-contrib-chatbot to your FRED account. To do that, use the management panel on the left of the FRED UI, select Add or Remove Nodes and look for the chatbot node in the list of nodes FRED provides. Select it and install.
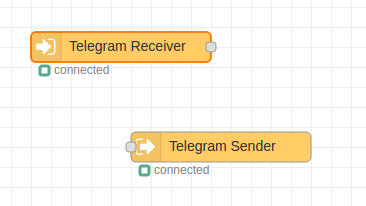
Then, we will drag the Telegram Receiver node and the Telegram Sender node onto the editor. Double click on one node, setup the bot information by entering the bot API key that you received when you created the chatbot on Telegram. If it all works out, you should see these nodes indicating that they are connected.
You can connect these two nodes, and start a conversation to this bot on Telegram. If you have set up correctly, you should see echo messages coming back on the Telegram messenger (receiver).
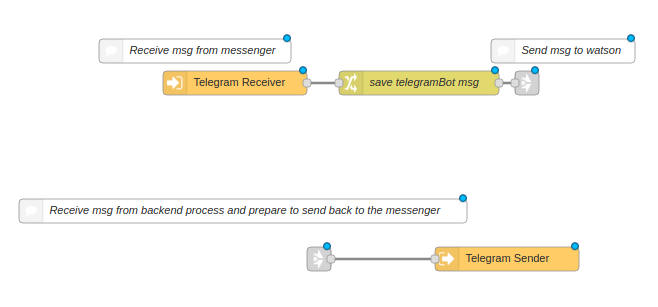
We are going to use multiple tabs in Node-RED for this application, and make use of the link node to connect flows between tabs. Let’s name this tab as Messenger to FRED, since it only contains nodes for communicating with messenger platforms. We will use link nodes to connect to other flows in other tabs. We will link the flows at the end.
We also want to keep the original message content from the Telegram Receiver node because it contains information that is required to send the message back to the users on Telegram. We will use a change node to save the telegram messages by setting msg.telegramBot to msg.payload.
So far, the setup should look like this:
Now the messengers are connected to FRED, we will continue to the next step.
Connect FRED to Watson Conversation
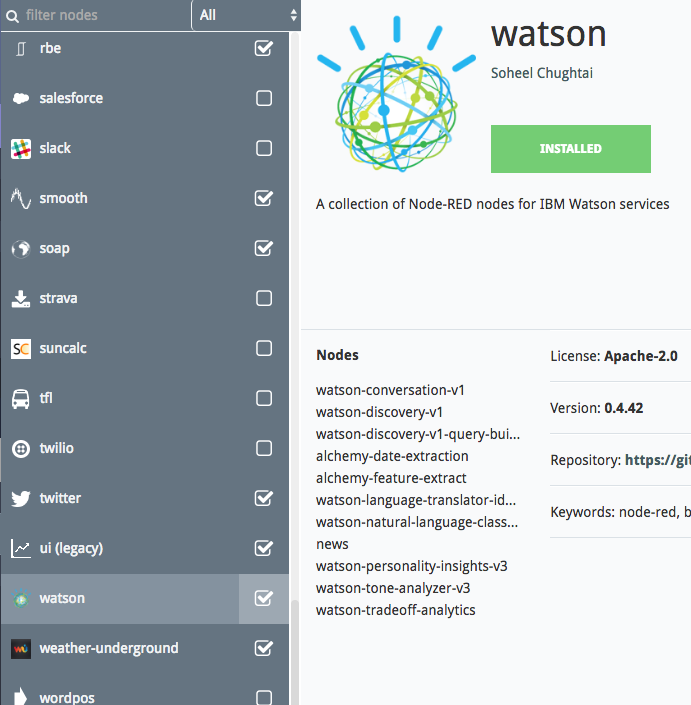
For this part, we will need to install node-red-node-watson. You can find this node in Add or Remove Nodes. This is a set of nodes developed by IBM that can connect to Watson services. (Note, this is a subset of the IBM nodes. We have ported and tested these on FRED since they weren’t designed to run in a shared cloud environment)
Let’s create a new tab in the editor called “FRED to Watson”.
Similar to the previous section, we will be using two link nodes to connect to other tabs. We will also need two change nodes and the Watson Conversation node that you just installed.

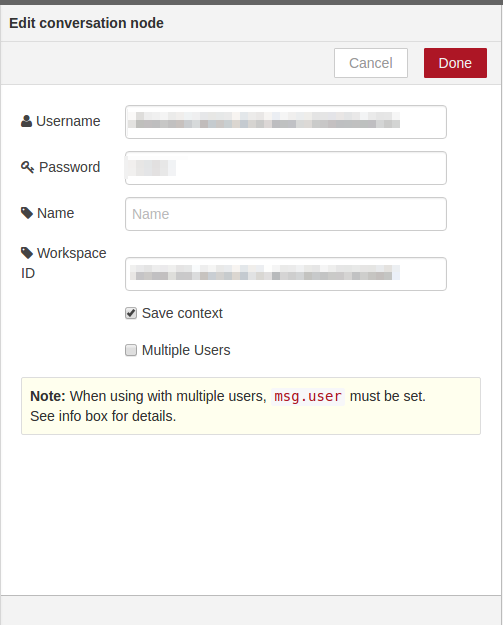
In the configuration tab of the conversation node, you will need some info from the Watson Conversation workspace. Let’s head back to Watson Conversation workspace.
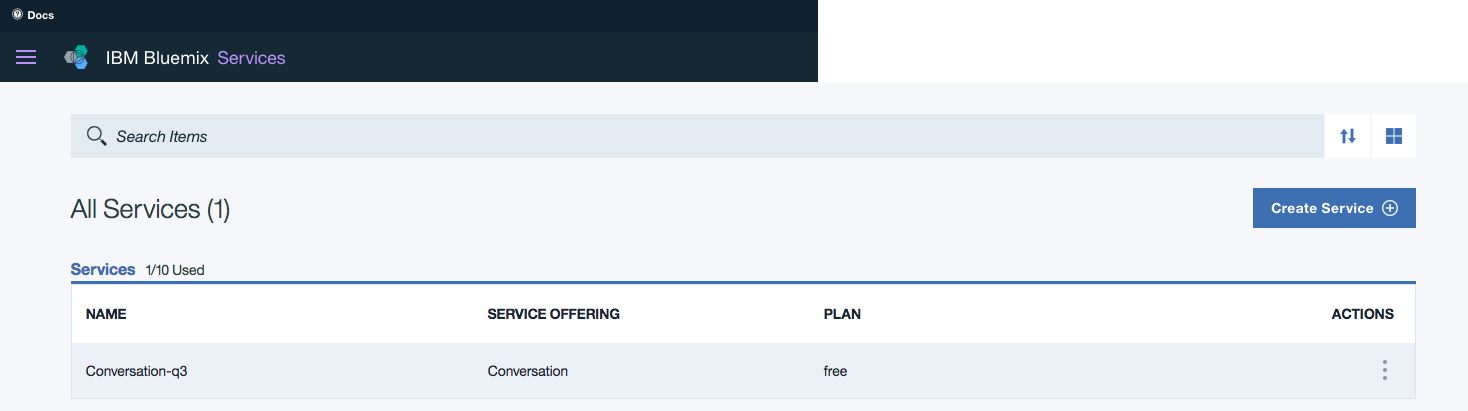
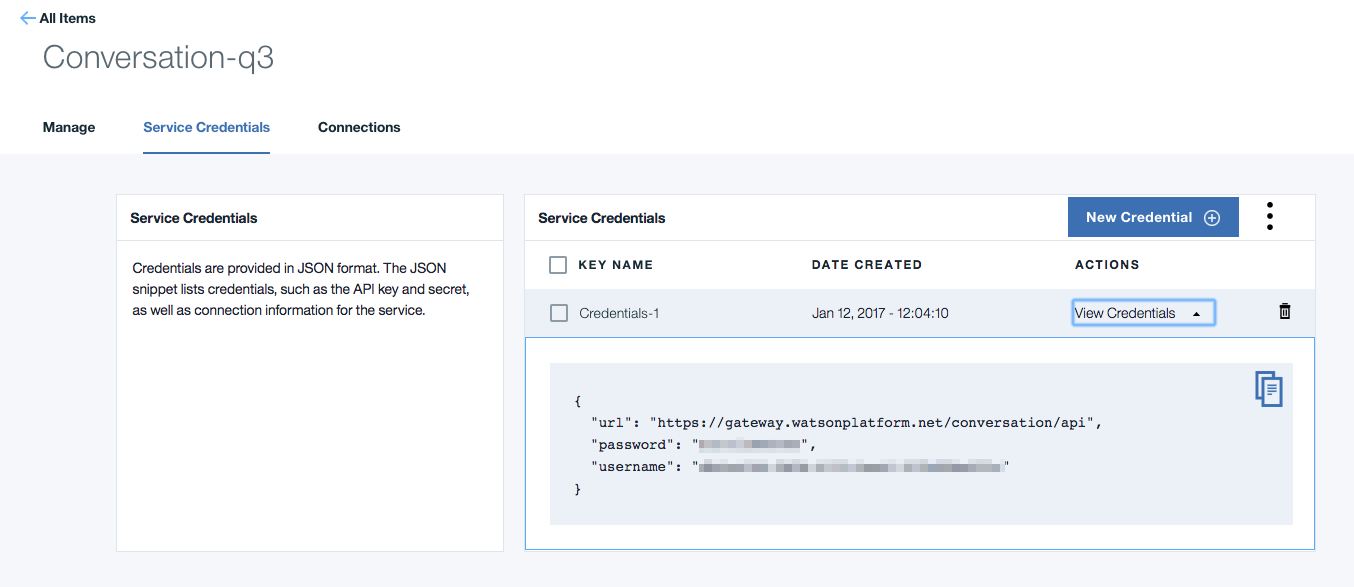
When you click the Actions button -> View details, you should see the Workspace ID, copy that down to the Watson Conversation node. Then, go to the Bluemix dashboard, click the conversation service in all service, then click the “service credentials” tab, you will be able to find the username and password to access your conversation app.
 And this is how the config tab of the Conversation node should look like:
The “prepare to send to watson” change node simply sets msg.payload to msg.telegramBot.content, so we can send the text content from Telegram to Watson. Then, we have the “save to watsonMsg” change node where we set msg.watsonMsg to msg.payload to save the output of Watson Conversation for further process.
Now, back to the “messenger to FRED” tab, we also need to send the output from msg.watsonMsg back to the Telegram Sender node.
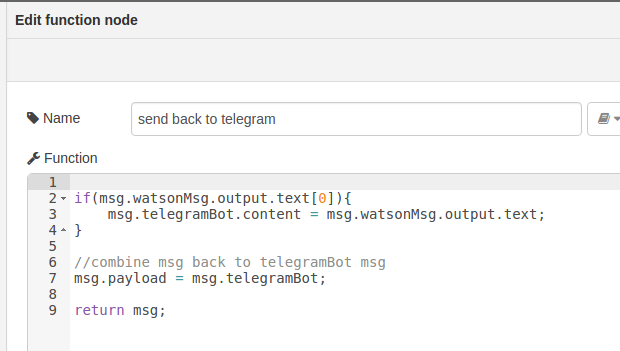
We will add one Function node in front of the Telegram Sender node, with the following content.
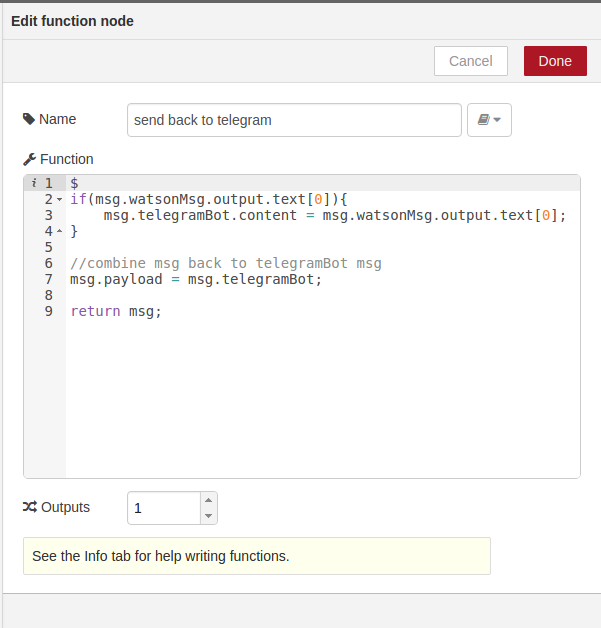
And the flow in “Messenger to FRED” should look like:
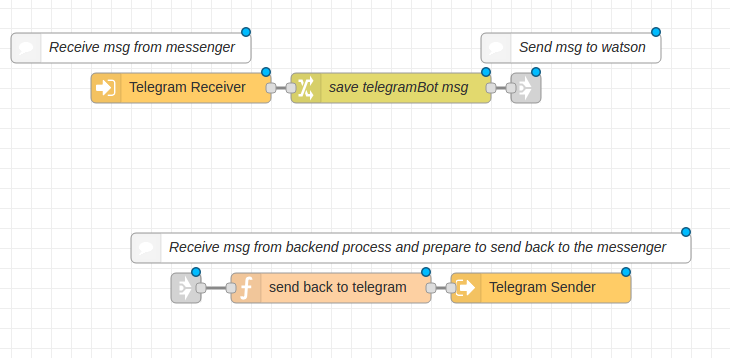
As you can see, we first merge the output from Watson Conversation to the Telegram message that we had stored earlier, and we finally set msg.payload to the Telegram message we have saved and send it to Telegram Sender node.
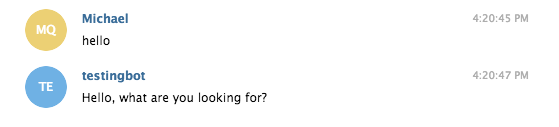
At this point, you have already connected the Telegram chatbot to Watson Conversation. If you connect these flows together, you should be able to get simple responses from Watson to Telegram:
The Node-RED flows that do the amazing stuff
Now comes the hard part. We want the chatbot to be able to perform certain tasks upon requests. In our user story, this chatbot is able to provide simple recommendations and check info such as availability, price and customer reviews. Since we are using the Walmart database API as a mock back-end database, let’s start a new tab call “FRED to Walmart API”.
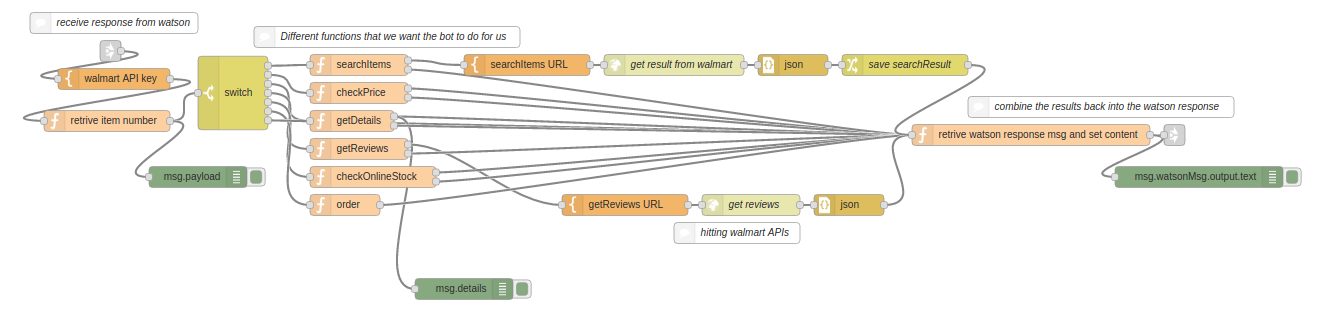
Again, we will have two link nodes that connect from the flow in the “FRED to Watson” tab and to the “Messenger to FRED” tab. We will set a Switch node to send the message to different function nodes according to the users’ intent. We will perform different tasks and combine the output back to msg.watsonMsg.output.text, which will be merged into msg.telegramBot and sent back to Telegram later on.
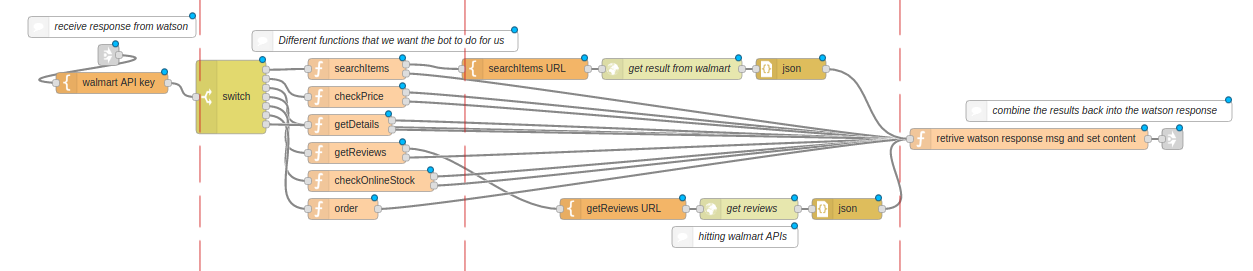
As you can see from this diagram, we have set four stages in this example. The first stage is to get the response from Watson, and we add the Walmart API key that we got from the Walmart database API. The second stage is where we inspect the Watson response and send it to different function nodes according to the intent. For example, if the intent is “searchItems”, the function node “searchItems” will go through the entities array from the Watson response, and generate msg.url for the HTTP request node. The third stage is to call the database APIs. The last stage is to combine the result back to msg.watsonMsg, where it will be further processed later on.
You can import these flows from the sample code provided on our Github. If you are not sure how to import flow codes, please refer to: here.
Also, if you have been following the tutorial, we need to make a small modification to the “send back to telegram” node in the “messenger to FRED” tab because we had modified the message in “FRED to Walmart API” tab. The updated code for “send back to telegram” node would look like this:
In general, the second and the third stage is where you design the functionality of your chatbot. You are more than welcome to design your own features.
At this stage, you have a basic, simple chatbot that uses the watson functionality to understand natural language. This is already pretty impressive ….
But, a smart chatbot should also know the context!
However, the chatbot we have so far can only respond to the current input from users. Although it can handle multiple user inputs, it still cannot relate the input to the overall conversation context. We need to do this if we want to make our chatbot “smart”.
The general idea in this section is to show you how we can use FRED to keep context of the conversation. In this sample, there will be a few spots that we need to save the data on FRED.
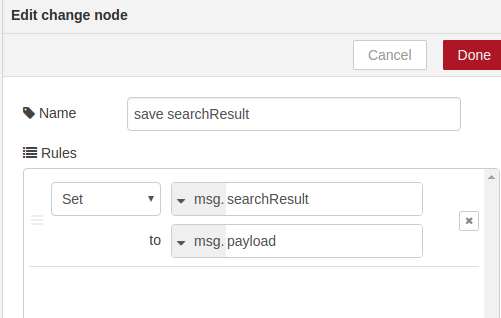
- When the user send in a search query, we want to save the search result in the context
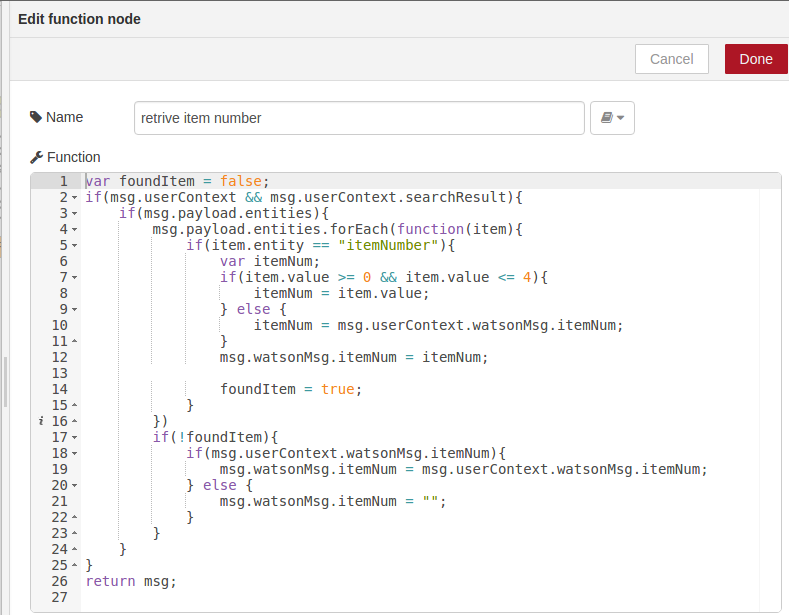
- When the user send in an arbitrary item number, we want to be able to retrieve the search result from the context
- When the user send in a word like “it”, we want to be able to retrieve the item number that the user was talking about earlier.
- When the message is sent out, we want to keep the context by mapping with the Telegram chatId.
- When a message comes in, we want to be able to retrieve the context data from memory by using the Telegram ChatID.
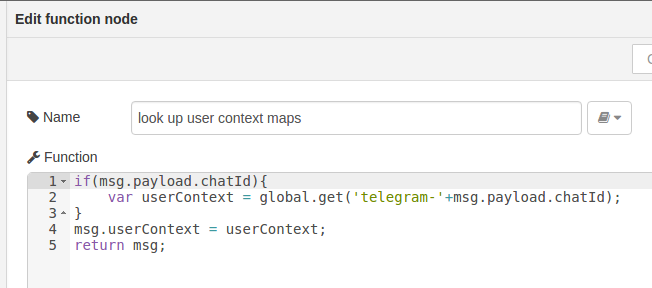
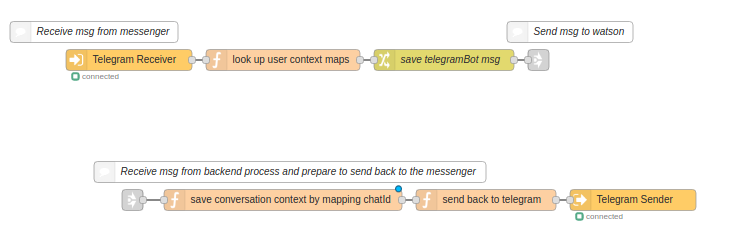
First, let’s save the message context for each user. Let’s go to the “Messenger to FRED” tab, and add a function node before sending out the message to Telegram sender node. The purpose of this node is to save the context on local mapping to the chatId that was shown in the Telegram message. If you have a lot of data flowing, you can also save the context to a database (See our tutorial on using SQL lite).
Here is how we save the context

You will also need a node to pull out this saved context when message was sent in from telegram, we can add this node:
So, the flow in “Messenger to FRED” would look like this:
We can leave the “FRED to Watson” tab as it is. We will need to add some more nodes in “FRED to Walmart API” tab.
As you had seen in the sample conversation above, we sent out a menu from the chatbot, and the user refers to the item on the list. In order to maintain the status, we would want to keep a record of the item number and also the item search result.
We first add a function node after calling the search items API to save the search result.
We also add a function node before the switch to get the item number:
and now the flow would look like:
Now if you connect all the flows, you would have an AI chatbot that can handle multiple users and maintain conversational context!
Ok, that’s it – it’s quite a complex tutorial, but we think you’ll agree, the resulting chatbot is very impressive. What’s more, this basic example can now be modified to adapt to your specific needs – have fun!
About Sense Tecnic: Sense Tecnic Systems Inc have been building IoT applications and services since 2010. We provide FRED, cloud hosted Node-RED as a service to the community. We also offer a commercial version to our customers, as well as professional services. Learn more.