
In this guide you will learn how to control (turn them off or on) things based on data using Node RED on a Raspberry Pi. You will learn how to turn a fan on or off using a relay when the weather temperature raises above a level.
What is Node RED?
Node-RED is a visual tool for wiring the Internet of Things developed by IBM Emerging Technology and the open source community. Using Node-RED, developers wire up input, output and processing nodes to create flows to process data, control things, or send alerts. It works by allowing you to wire up web services or custom “nodes” to each other, or to things, to do things like:
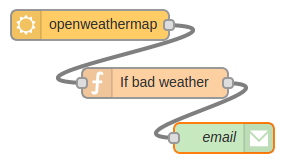
- Send an email on a rainy weather forecast.
- Push sensor data to services like Twitter.
- Perform complex analysis on data with ease.
If you’re new to Node RED you might find our Introduction to Node RED tutorial very helpful.
Wiring things up
We will use a Solid State relay like the Sharp S108T02 https://www.sparkfun.com/products/10636.
But you can also use a Fotek Solid State Relay http://www.fotek.com.hk/solid/SSR-1.htm that you can easily buy online https://www.sparkfun.com/products/13015 (but you can use your own).
Or to make things simpler you could use a break out board like this: https://www.sparkfun.com/products/10684
Wiring the S108T02 Relay is easy, you will need a 2N transistor (to protect your Raspberry Pi) and two resistors (330 and 10K):

The green wires can connect to anything (120V – 220V, or depending on the specifications of you Relay) to actuate almost anything, a fan, a light bulb, etc.
Programming your Raspberry Pi 2 with Node RED
The latest versions of the Pi have Node-RED pre-installed. If you ned to install Node RED in your Raspberry PI you can use our script to install and configure Node RED to run in your Raspberry Pi when you boot it up: http://developers.sensetecnic.com/article/install-node-red-in-a-raspberry-pi-2/. Once you have run your script you will have a running installation of Node RED in your Pi. Simply visit “http://yourRaspberryPi2-IPaddress:1880” to get started.
For this example we will be using four nodes; an “Inject” node, a “Open Weather Map” node, a “Function” node and a “Raspberry GPIO” node, like so:
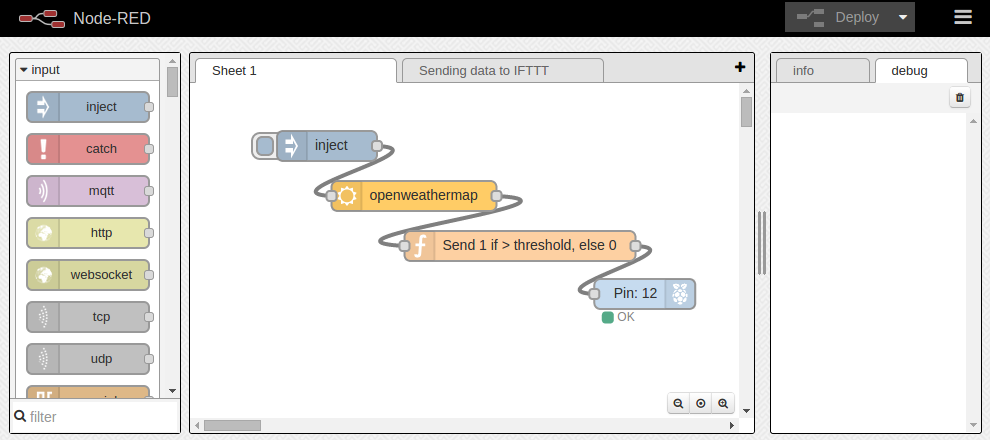
Notice that, the “Raspberry GPIO” node is only available when running on a Raspberry Pi.
We will configure our nodes so that every 10 minutes we will poll the weather from a city, this temperature will be passed to a function that if the temperature exceeds a number will output “1” triggering “on” a pin in our Raspberry Pi.
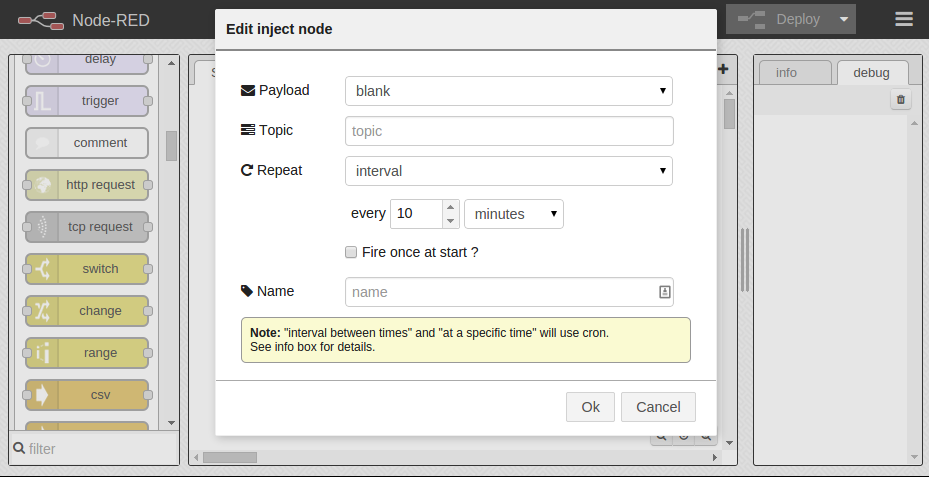
Let’s start by double clicking on our “Inject function” and configure it to send a “blank” Payload, as an “interval” Repeat every “10 minutes”.:
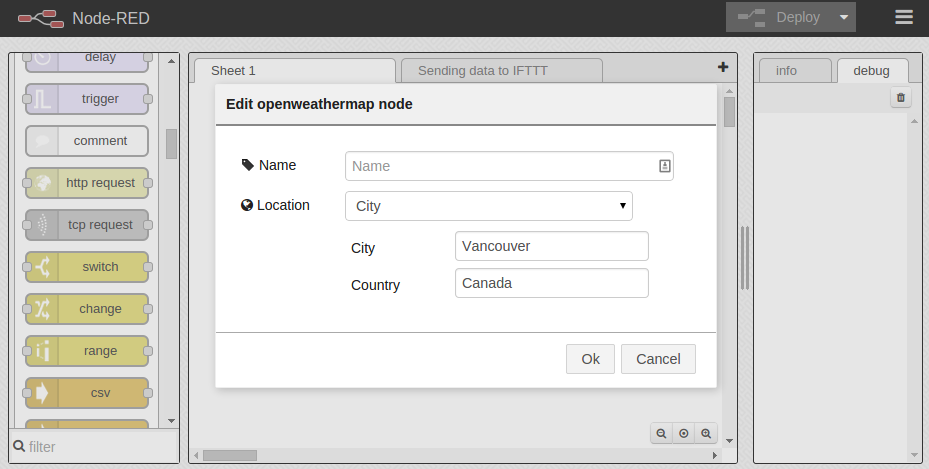
Double click the “Open Weather Map” node and configure your City and Country:
Double click on the “Function” node and paste the following code:
[javascript]
if (msg.payload.tempc > 25 ){
msg.payload = 1;
return msg;
} else {
msg.payload = 0;
return msg;
}
return null;
[/javascript]
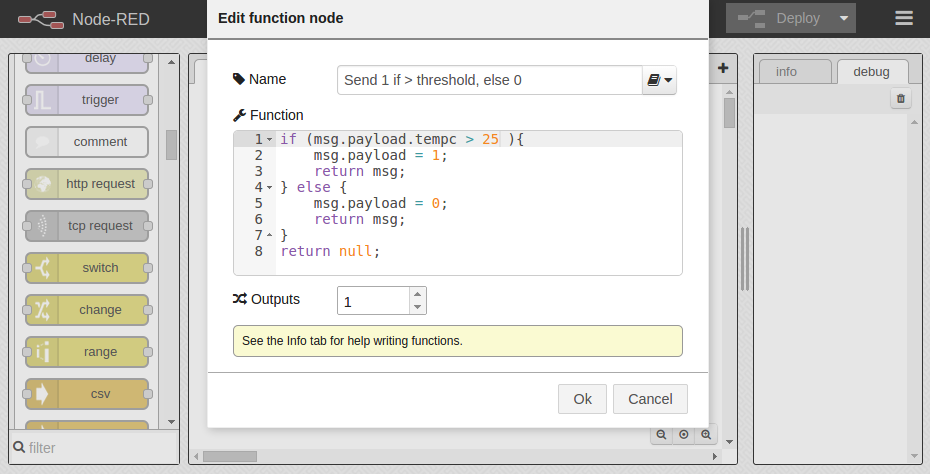
This function is quite simple, it will get the “tempc” value in the payload element received and if the value exceeds the value 25 it will send a payload containing “1”. Otherwise it will send a value of “0”. This is to trigger the following node, the Raspberry GPIO node. Let’s configure that. Double click on the “GPIO” node. Configure it to use “pin 12” and to be a type “Digital output”.
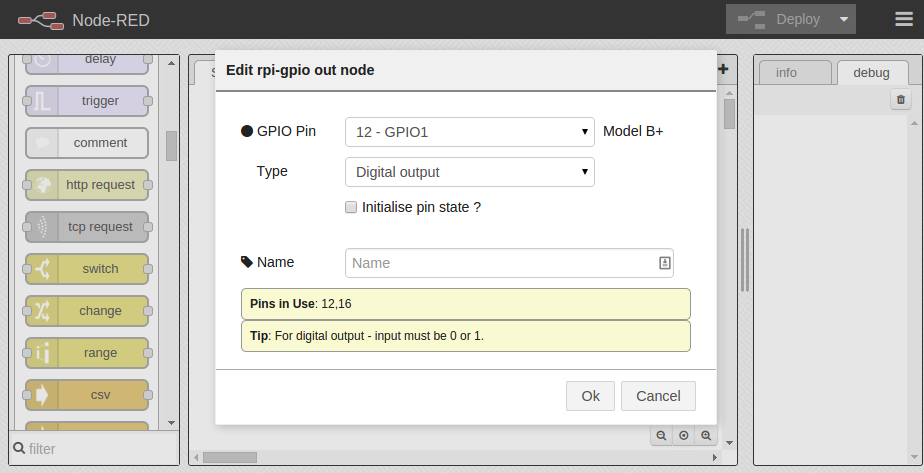
Notice that the node tells us that “For digital output – input must be 0 or 1”.
We are ready! Click on “Deploy” and then click on the left button next to the “Inject” node, to trigger the first event.
Notice that the “GPIO” node will tell you its current state, in my case 0, as the temperature does not exceed 25 degrees (C):

For your convenience you can copy and paste the flow by using the Import > Clipboard feature in Node RED:
[text]
[{“id”:”bb30366b.44cfc8″,”type”:”rpi-gpio out”,”name”:””,”pin”:”12″,”set”:false,”out”:”out”,”x”:454.8333740234375,”y”:211,”z”:”44525481.bbadac”,”wires”:[]},{“id”:”c88c40fe.3773c”,”type”:”openweathermap”,”name”:””,”lon”:””,”lat”:””,”city”:”Vancouver”,”country”:”Canada”,”x”:224,”y”:113,”z”:”44525481.bbadac”,”wires”:[[“6a40d38b.95bf2c”]]},{“id”:”6a40d38b.95bf2c”,”type”:”function”,”name”:”Send 1 if > threshold, else 0″,”func”:”if (msg.payload.tempc > 25 ){\n msg.payload = 1;\n return msg;\n} else {\n msg.payload = 0;\n return msg;\n}\nreturn null;”,”outputs”:1,”noerr”:0,”x”:330,”y”:163,”z”:”44525481.bbadac”,”wires”:[[“bb30366b.44cfc8”]]},{“id”:”5b7d7005.a4829″,”type”:”inject”,”name”:””,”topic”:””,”payload”:””,”payloadType”:”none”,”repeat”:”600″,”crontab”:””,”once”:false,”x”:137,”y”:63,”z”:”44525481.bbadac”,”wires”:[[“c88c40fe.3773c”]]}]
[/text]